Technology
Implementing Dynamic Localization On Android

In-app localization is inevitable in modern Android app development if your app is targeting global users. There are multiple ways one could implement in-app localization in an Android app.
In this blog, we're going to show you how our Android team generally implements dynamic localization at Codigo

Before we dive into the implementation, why the title “Dynamic Localization”?
It’s simply because we try to load the translations for the entire app at runtime. The data source for the translations can be from anywhere! (Remote, local JSON file, or from any kind of local asset)
What makes dynamic localization better than Android’s localized resources?
Android’s localized resources depend on your user’s device language settings. And it’s a hustle to manually control just the app-specific locale and reflect the changes in real time. (i.e. you’d have to restart your entire activity just to refresh the locale).
Plus, your translated resources are entirely local because it’s packaged with the APK. It means you’ll have to build and release a new version of the app every time you want to update the translations.
With Dynamic Localization, you can update your translations remotely from a CMS or an Admin Dashboard or anything, and your app will fetch and update at runtime without having to change your code or generate any new builds.
Sounds promising? Let’s implement it!
Our Goal
Let’s set our goals before we start. Our app should be able to :
- Load default localization data once the app starts
- Provide easy access to translations everywhere in the app
- Reflect the user’s preferred language in real-time (i.e app should reflect changes to the selected language without restarting the app)
- Support text templating in translated texts
- Use a default language in case something goes wrong
Our Solution
- Keep our default localization with a localization.json file as a raw asset.
- Create an abstract LocalizedViewModel providing localization-related information and functionalities so that any ViewModel can extend from it quite easily and take advantage off it.
- Expose an observable Localization data and persist the user’s selected language as a SharedPreference.
- Create a text formatting function, so that we can support text templating in our Localized Strings.
- Fallback to our cached translations in case remote fetching fails.
Demo project setup
Now that we’ve set our goals, let’s dive into the implementation. I’ve set up a project to demonstrate how we can do dynamic localization.
You can clone or download the sample project from the following repository.
The sample project uses the following stack:
- MVVM + Repositories + Local & Remote Data Sources
- Jetpack Compose + Single Activity (for UI)
- Kotlin Flows (for reactivity)
- Moshi-Kotlin (for JSON serialization)
- Dagger Hilt (for dependency injection)
App UI
The demo app is setup with a minimal UI with just one screen to present translated texts and three buttons to switch between languages: English, Chinese and Burmese.
Home screen of the Demo app with different language settings
[caption id="attachment_1312" align="aligncenter" width="307"] Demo App UI - English[/caption]
[caption id="attachment_1310" align="aligncenter" width="307"]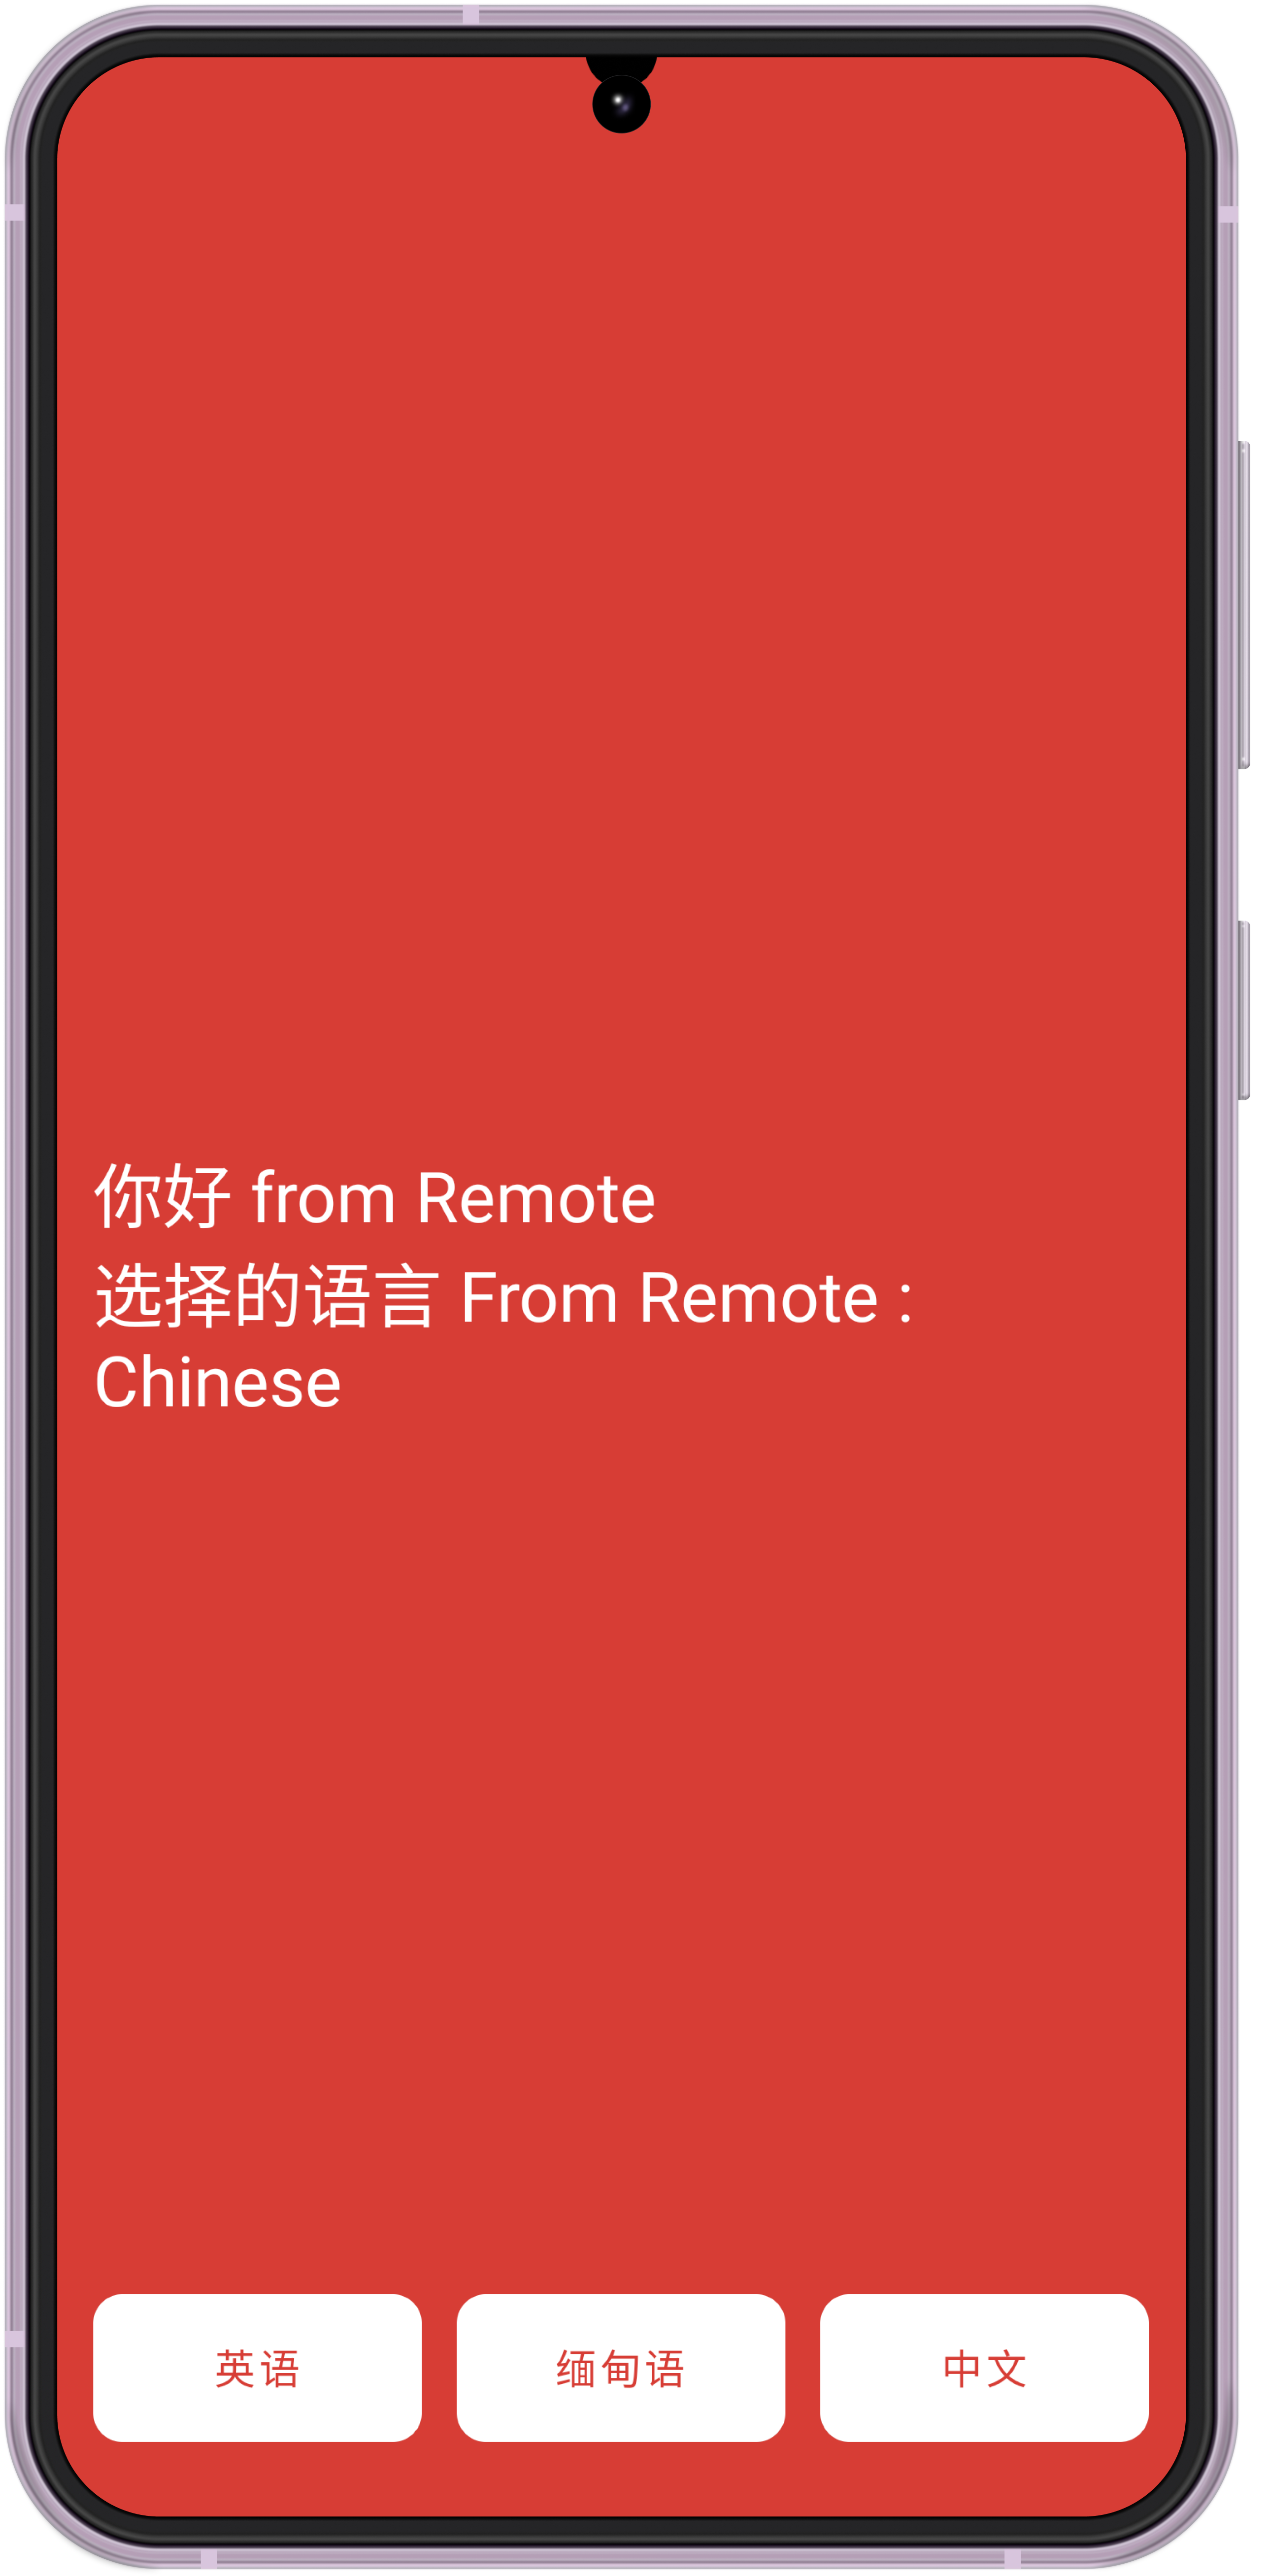 Demo App UI - Chinese[/caption]
[caption id="attachment_1311" align="aligncenter" width="307"]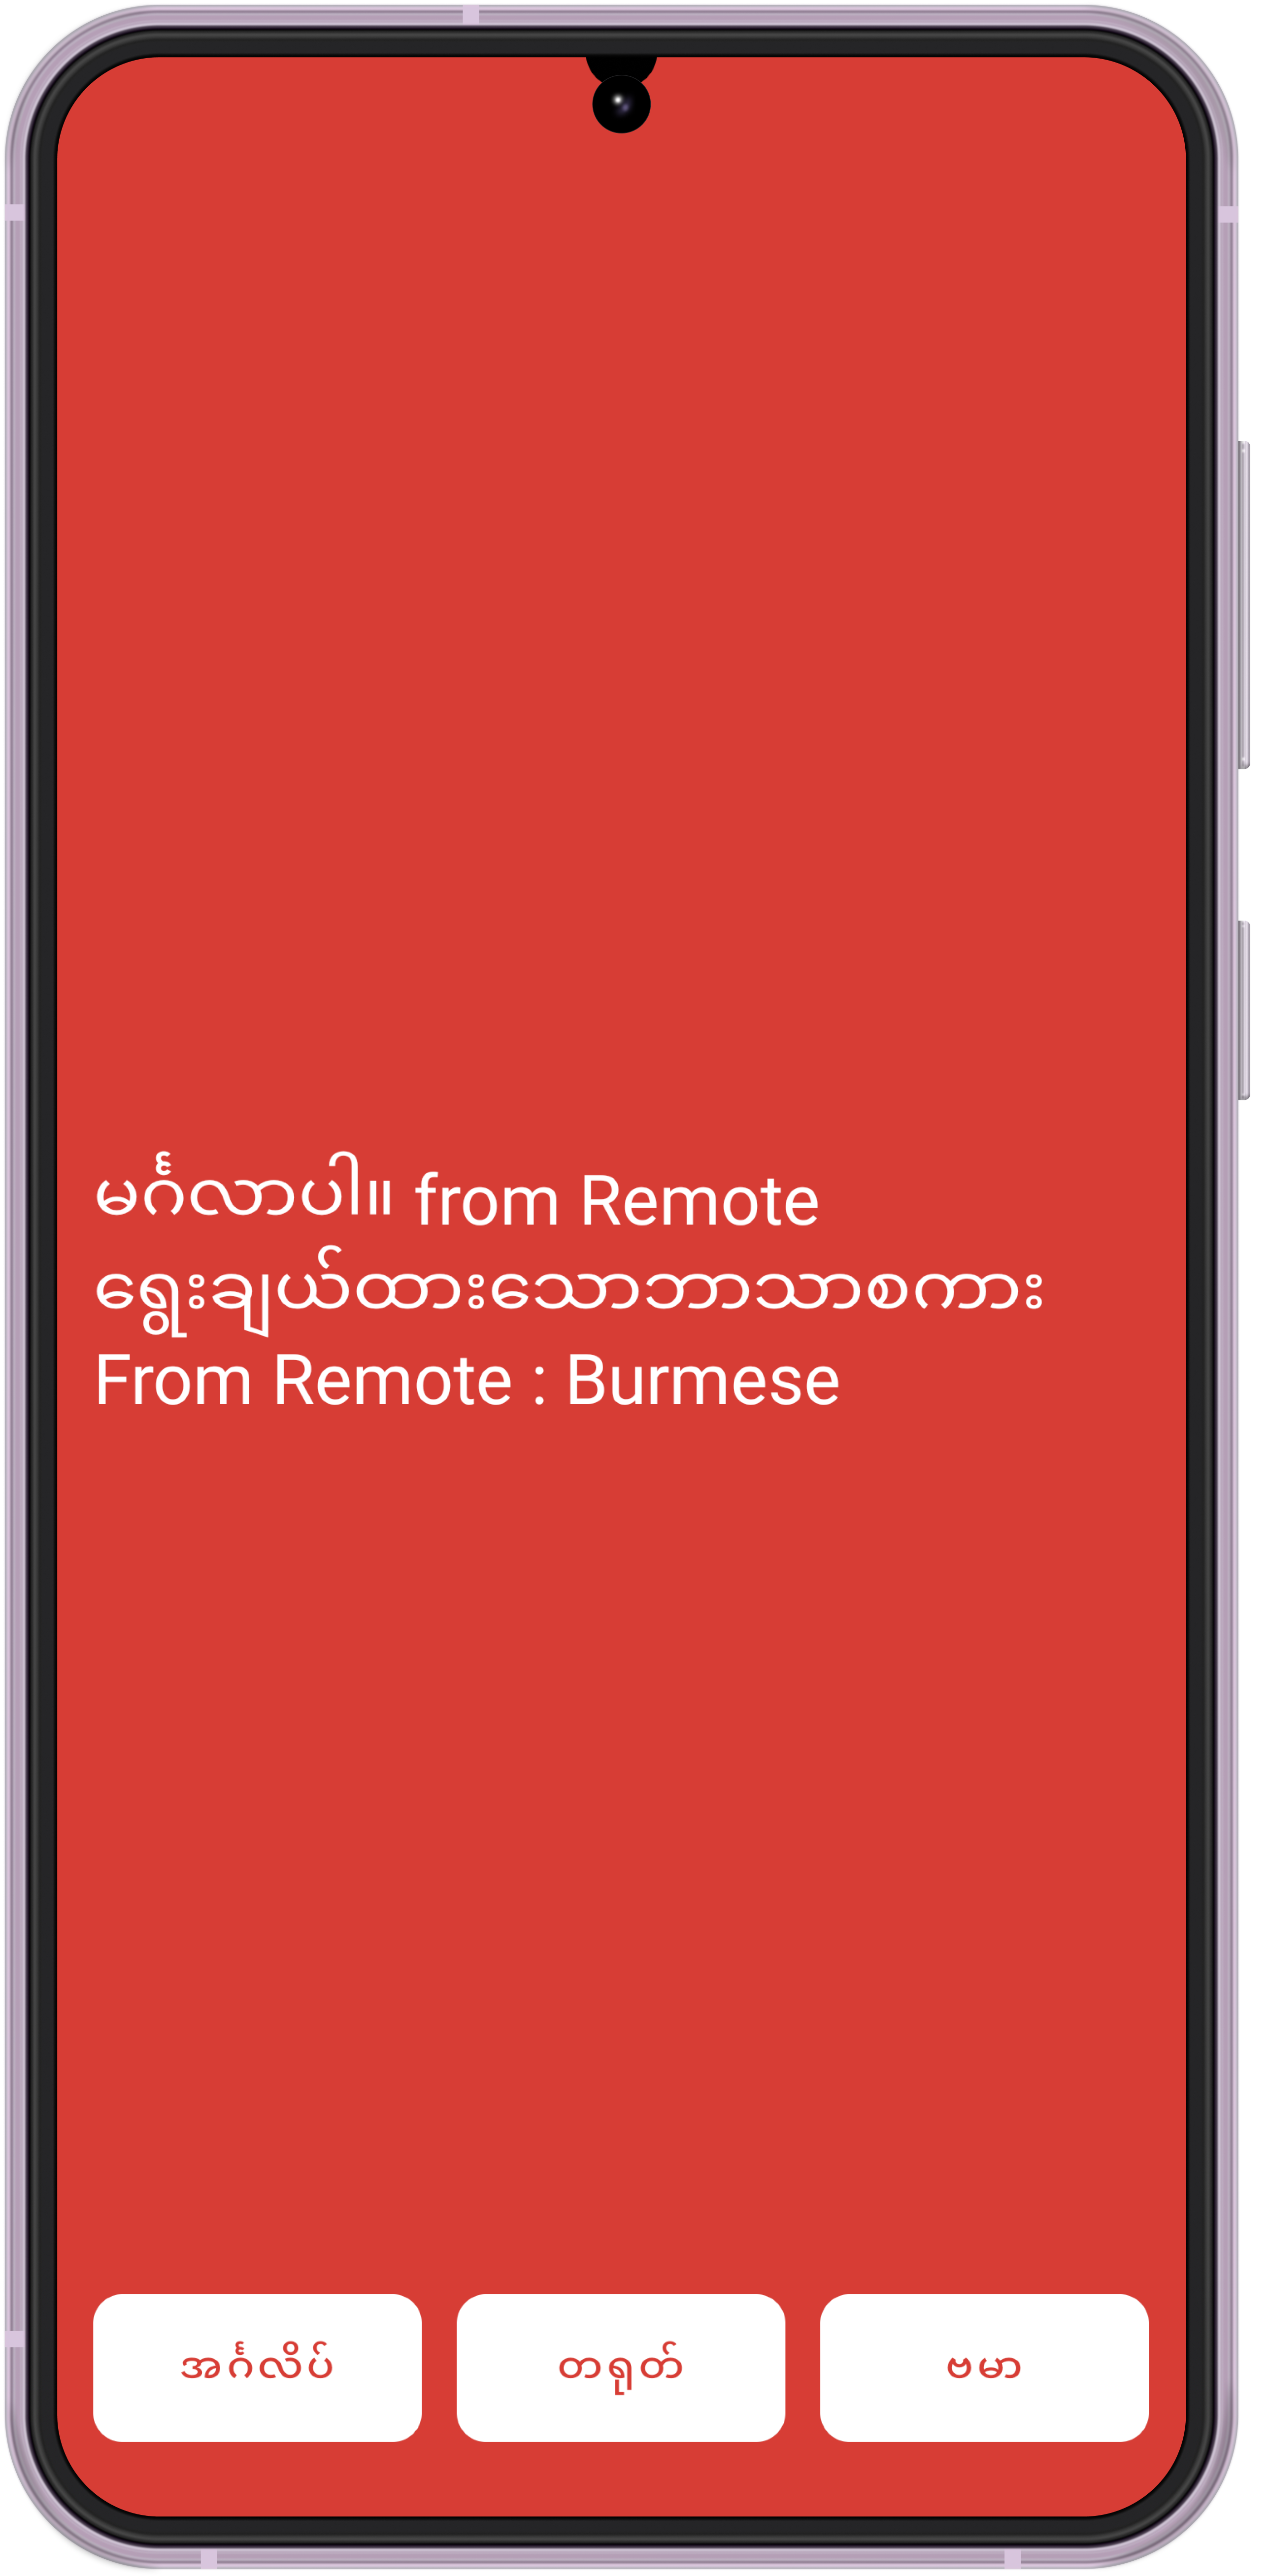 Demo App UI - Burmese[/caption]
Data Models
To supply our app with localization data, I’ve setup a localization.json file as a raw android resource.
If you checked the structure, it’s just three JSON objects, one for each translation. And each one of those contains the same set of keys. We’ll be using these translations in our demo app.
Now, let’s create a localisation class to hold the above translations.
Localization.getDefaultLocalization() function is used for preview purposes in Jetpack Compose.
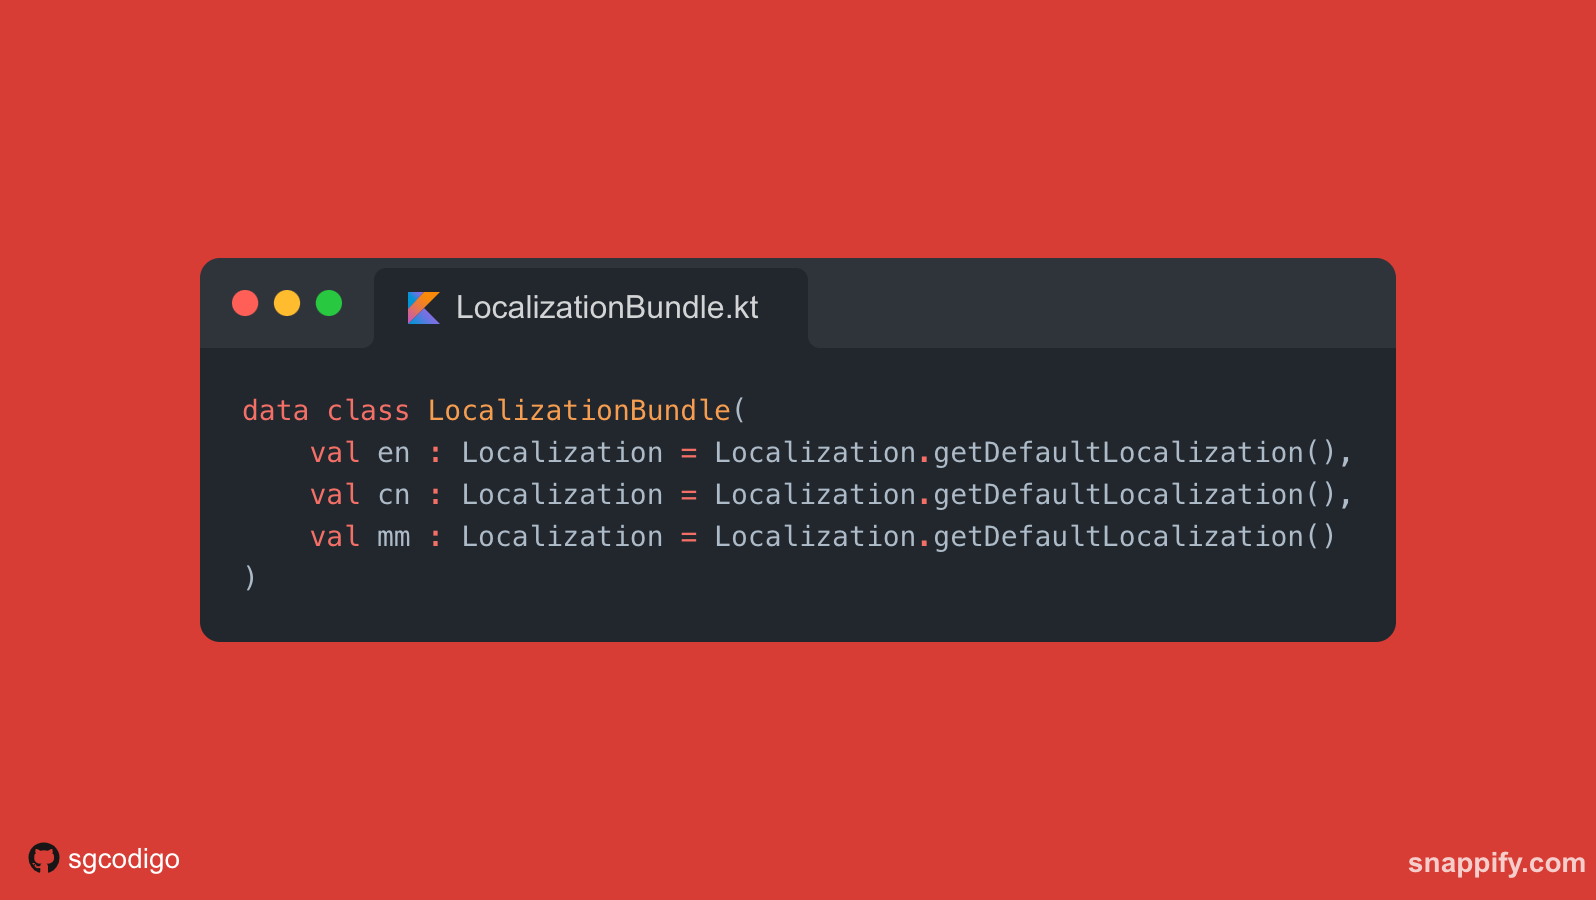
Now that we have the Localization class, we’ll create a LocalizationBundle class to hold the translations for all the languages.
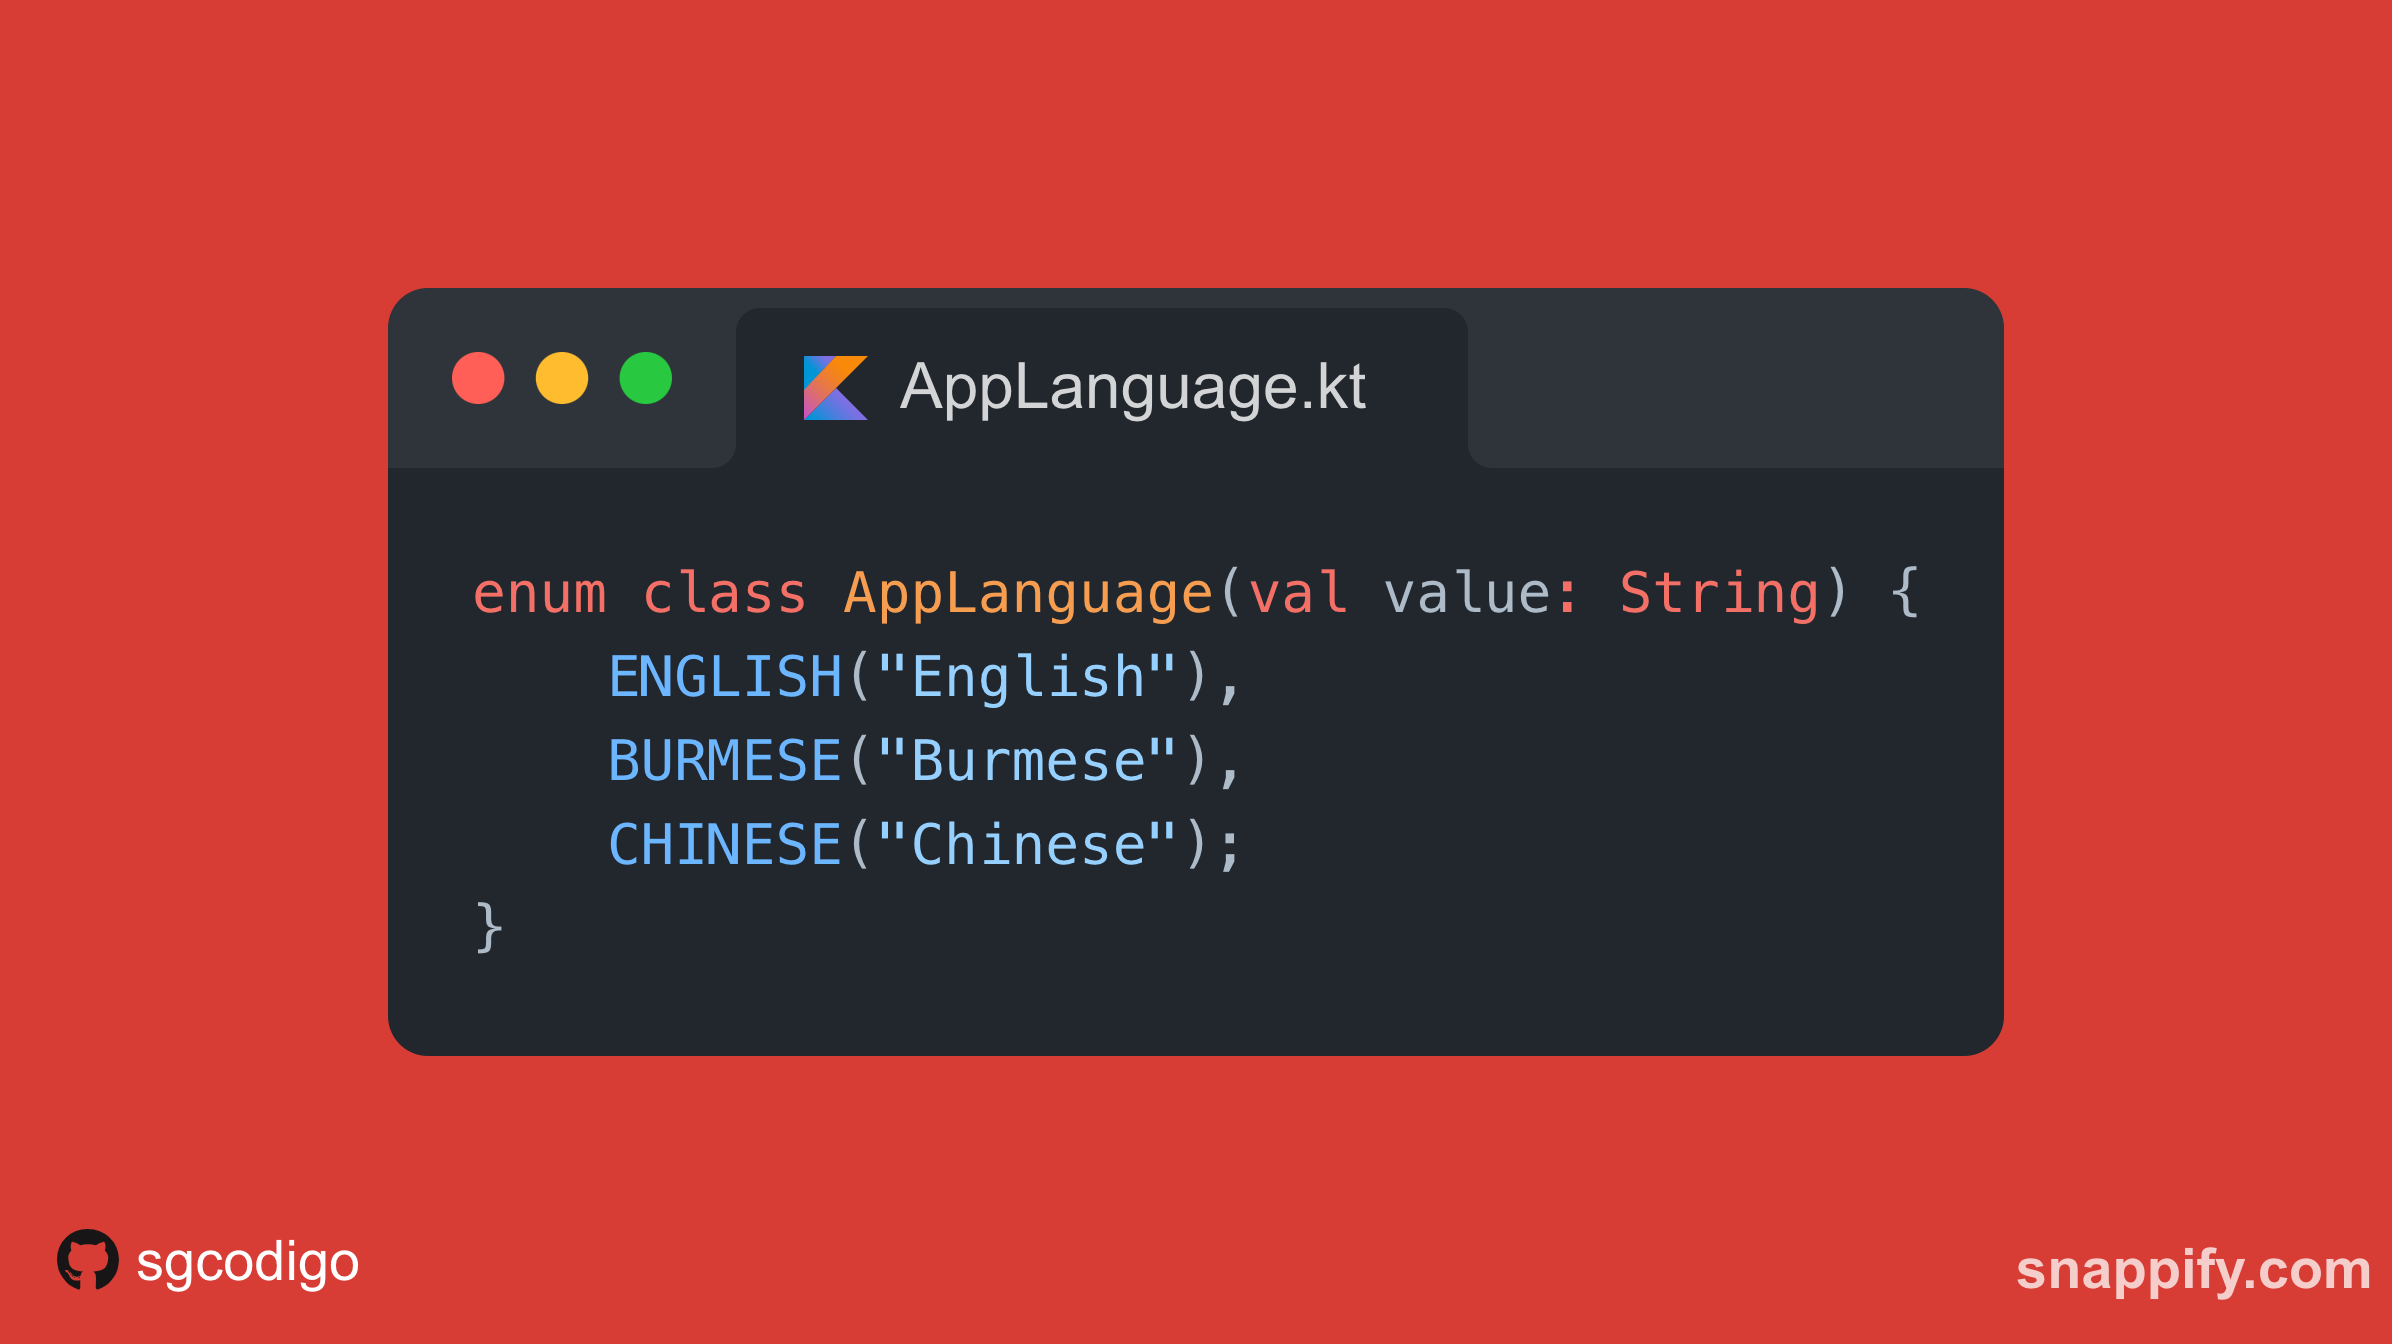
Finally, we’ll create an enum class to hold our supported languages.
And that’s it for the data models, we can now move on to the fun part, Repository and data sources
Repository and Data Sources
Our data layer is set up this way…
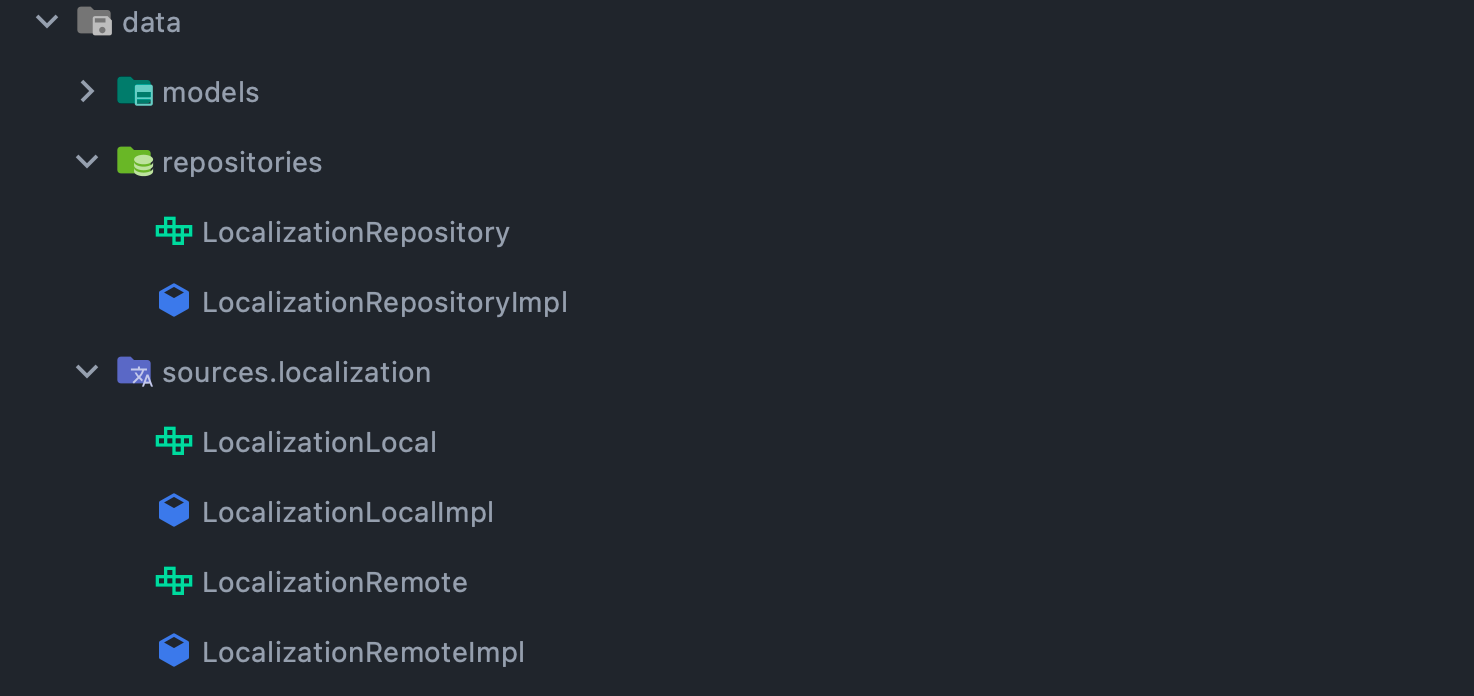
Localization Repository
LocalizationRepository will consume data from both local (raw JSON file) and remote (a dummy network API) sources
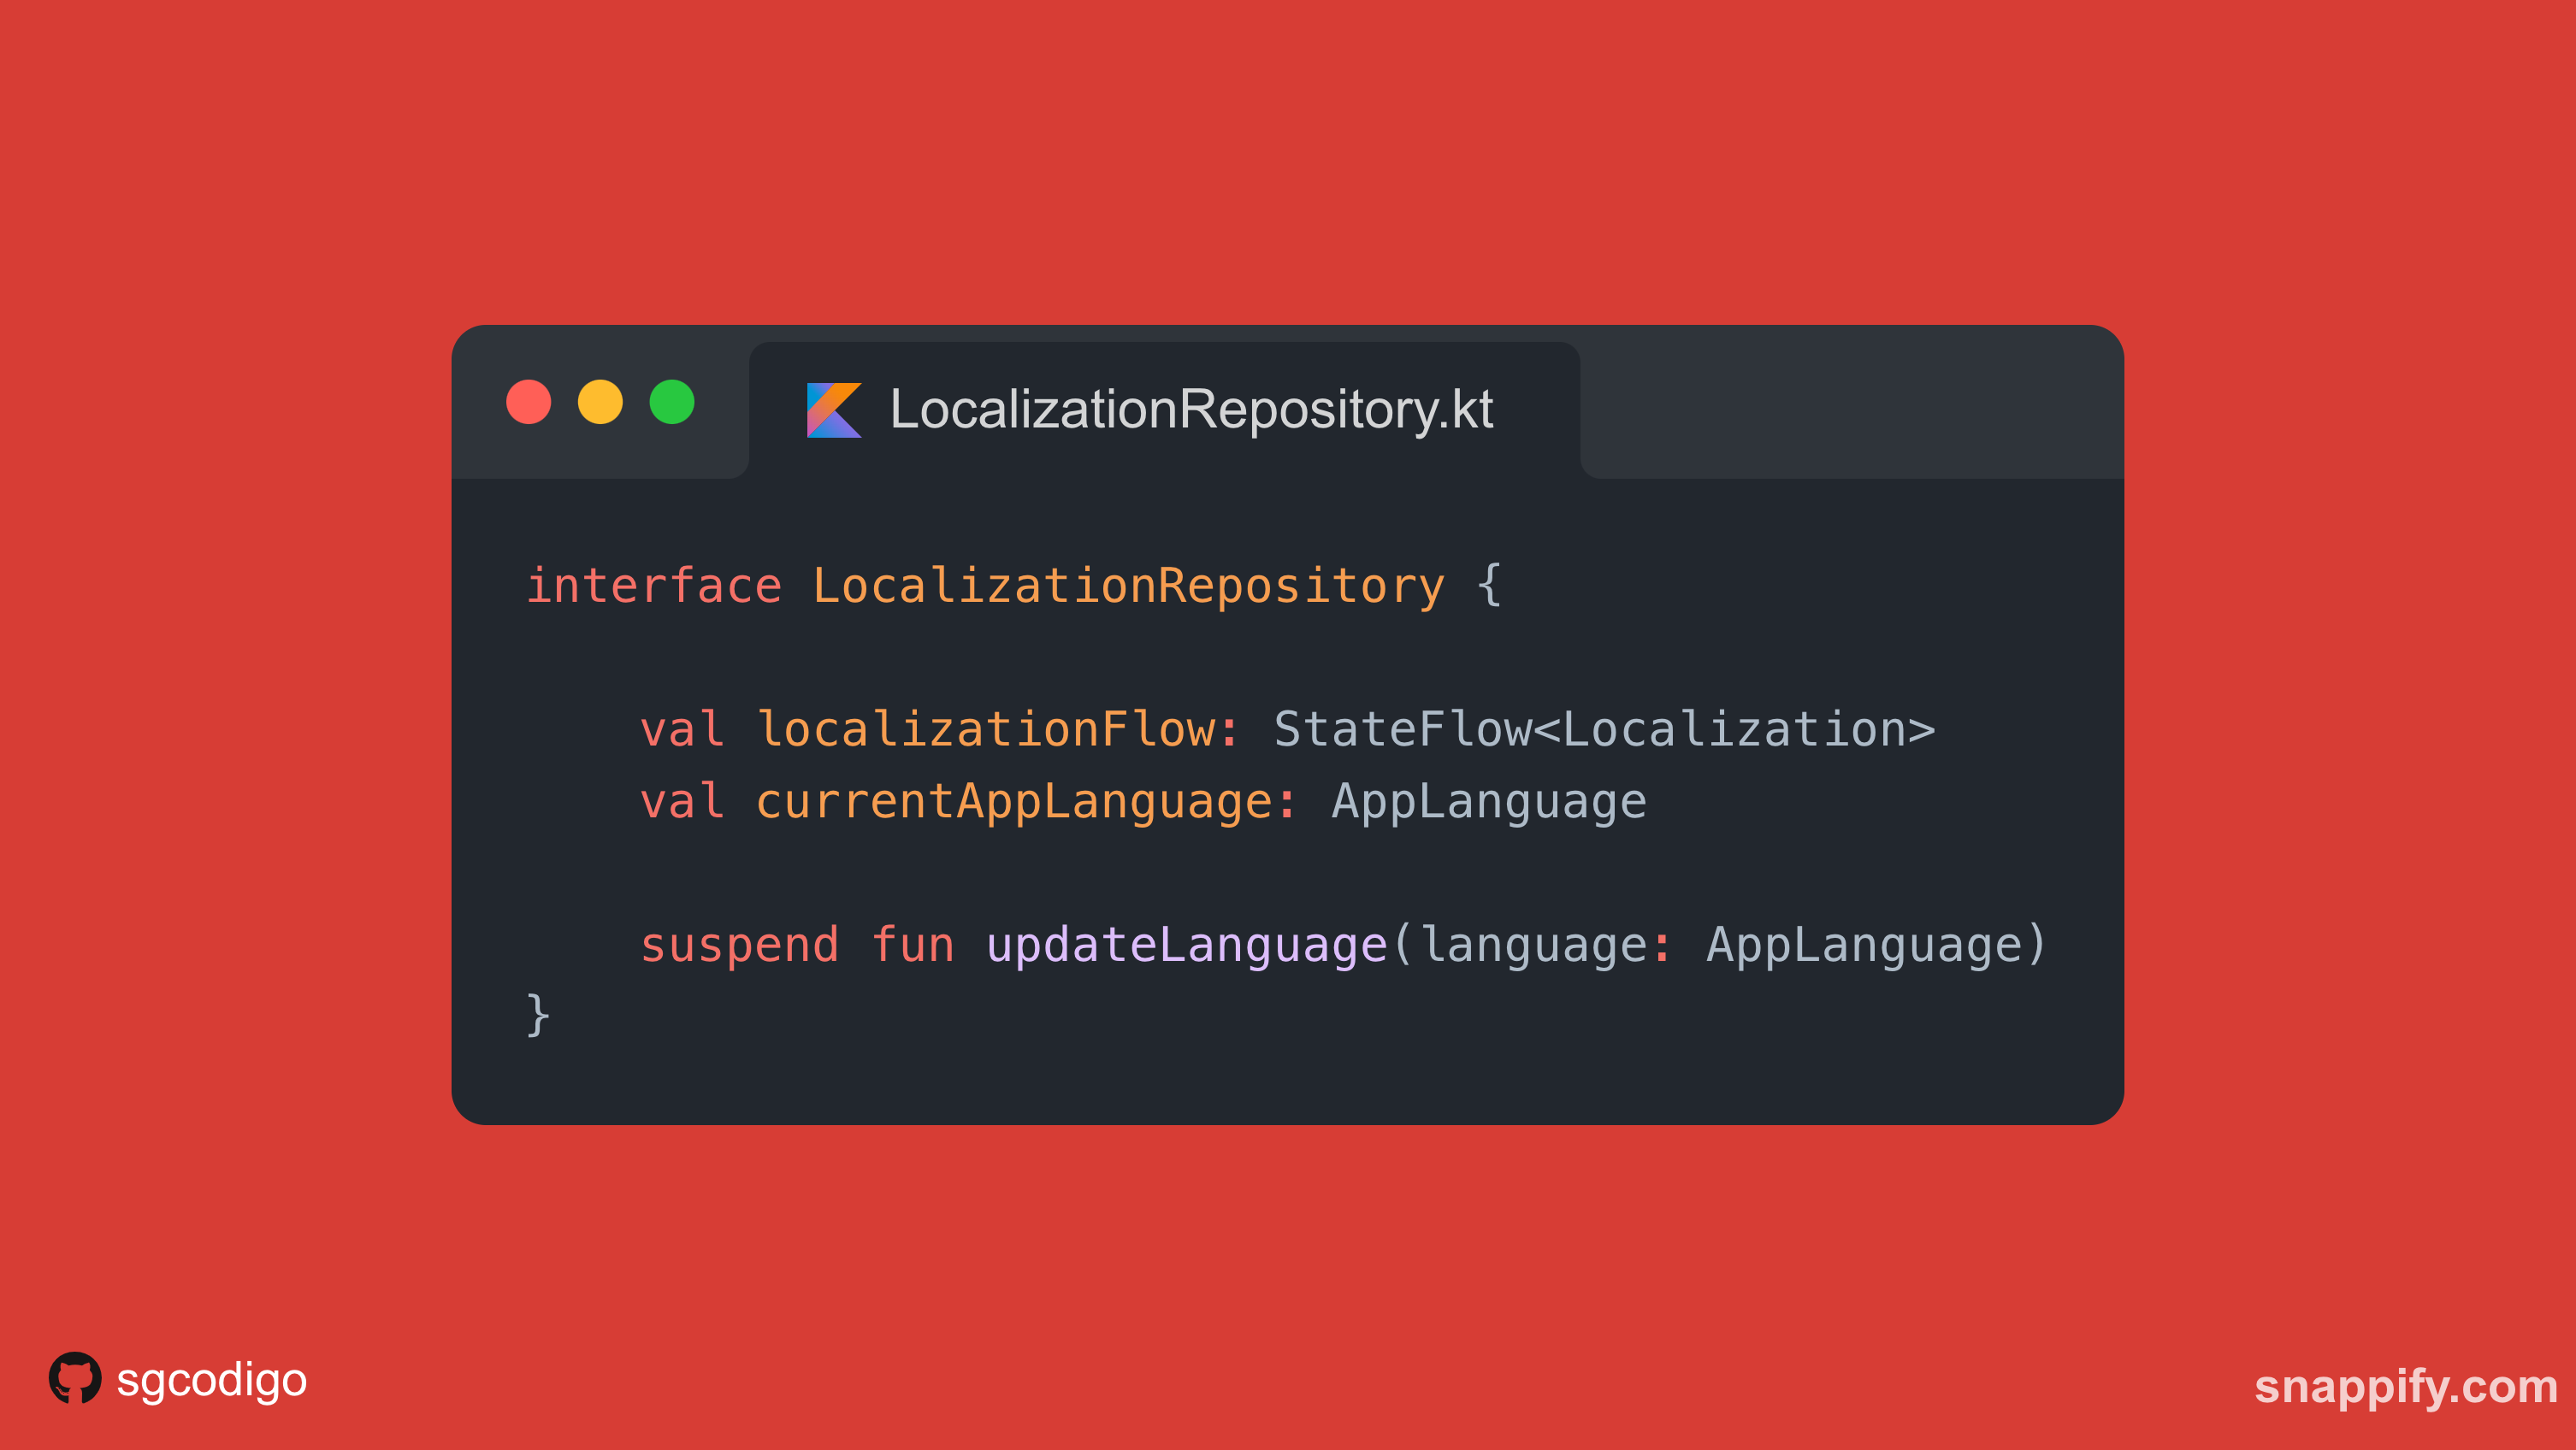
Our LocalizationRepository exposes the following…
- localizationflow to consume the localization in real-time
- currentAppLanguage , as the name describes
- updateLanguage function to switch between languages
And our implementation of LocalizationRepository is as follows…
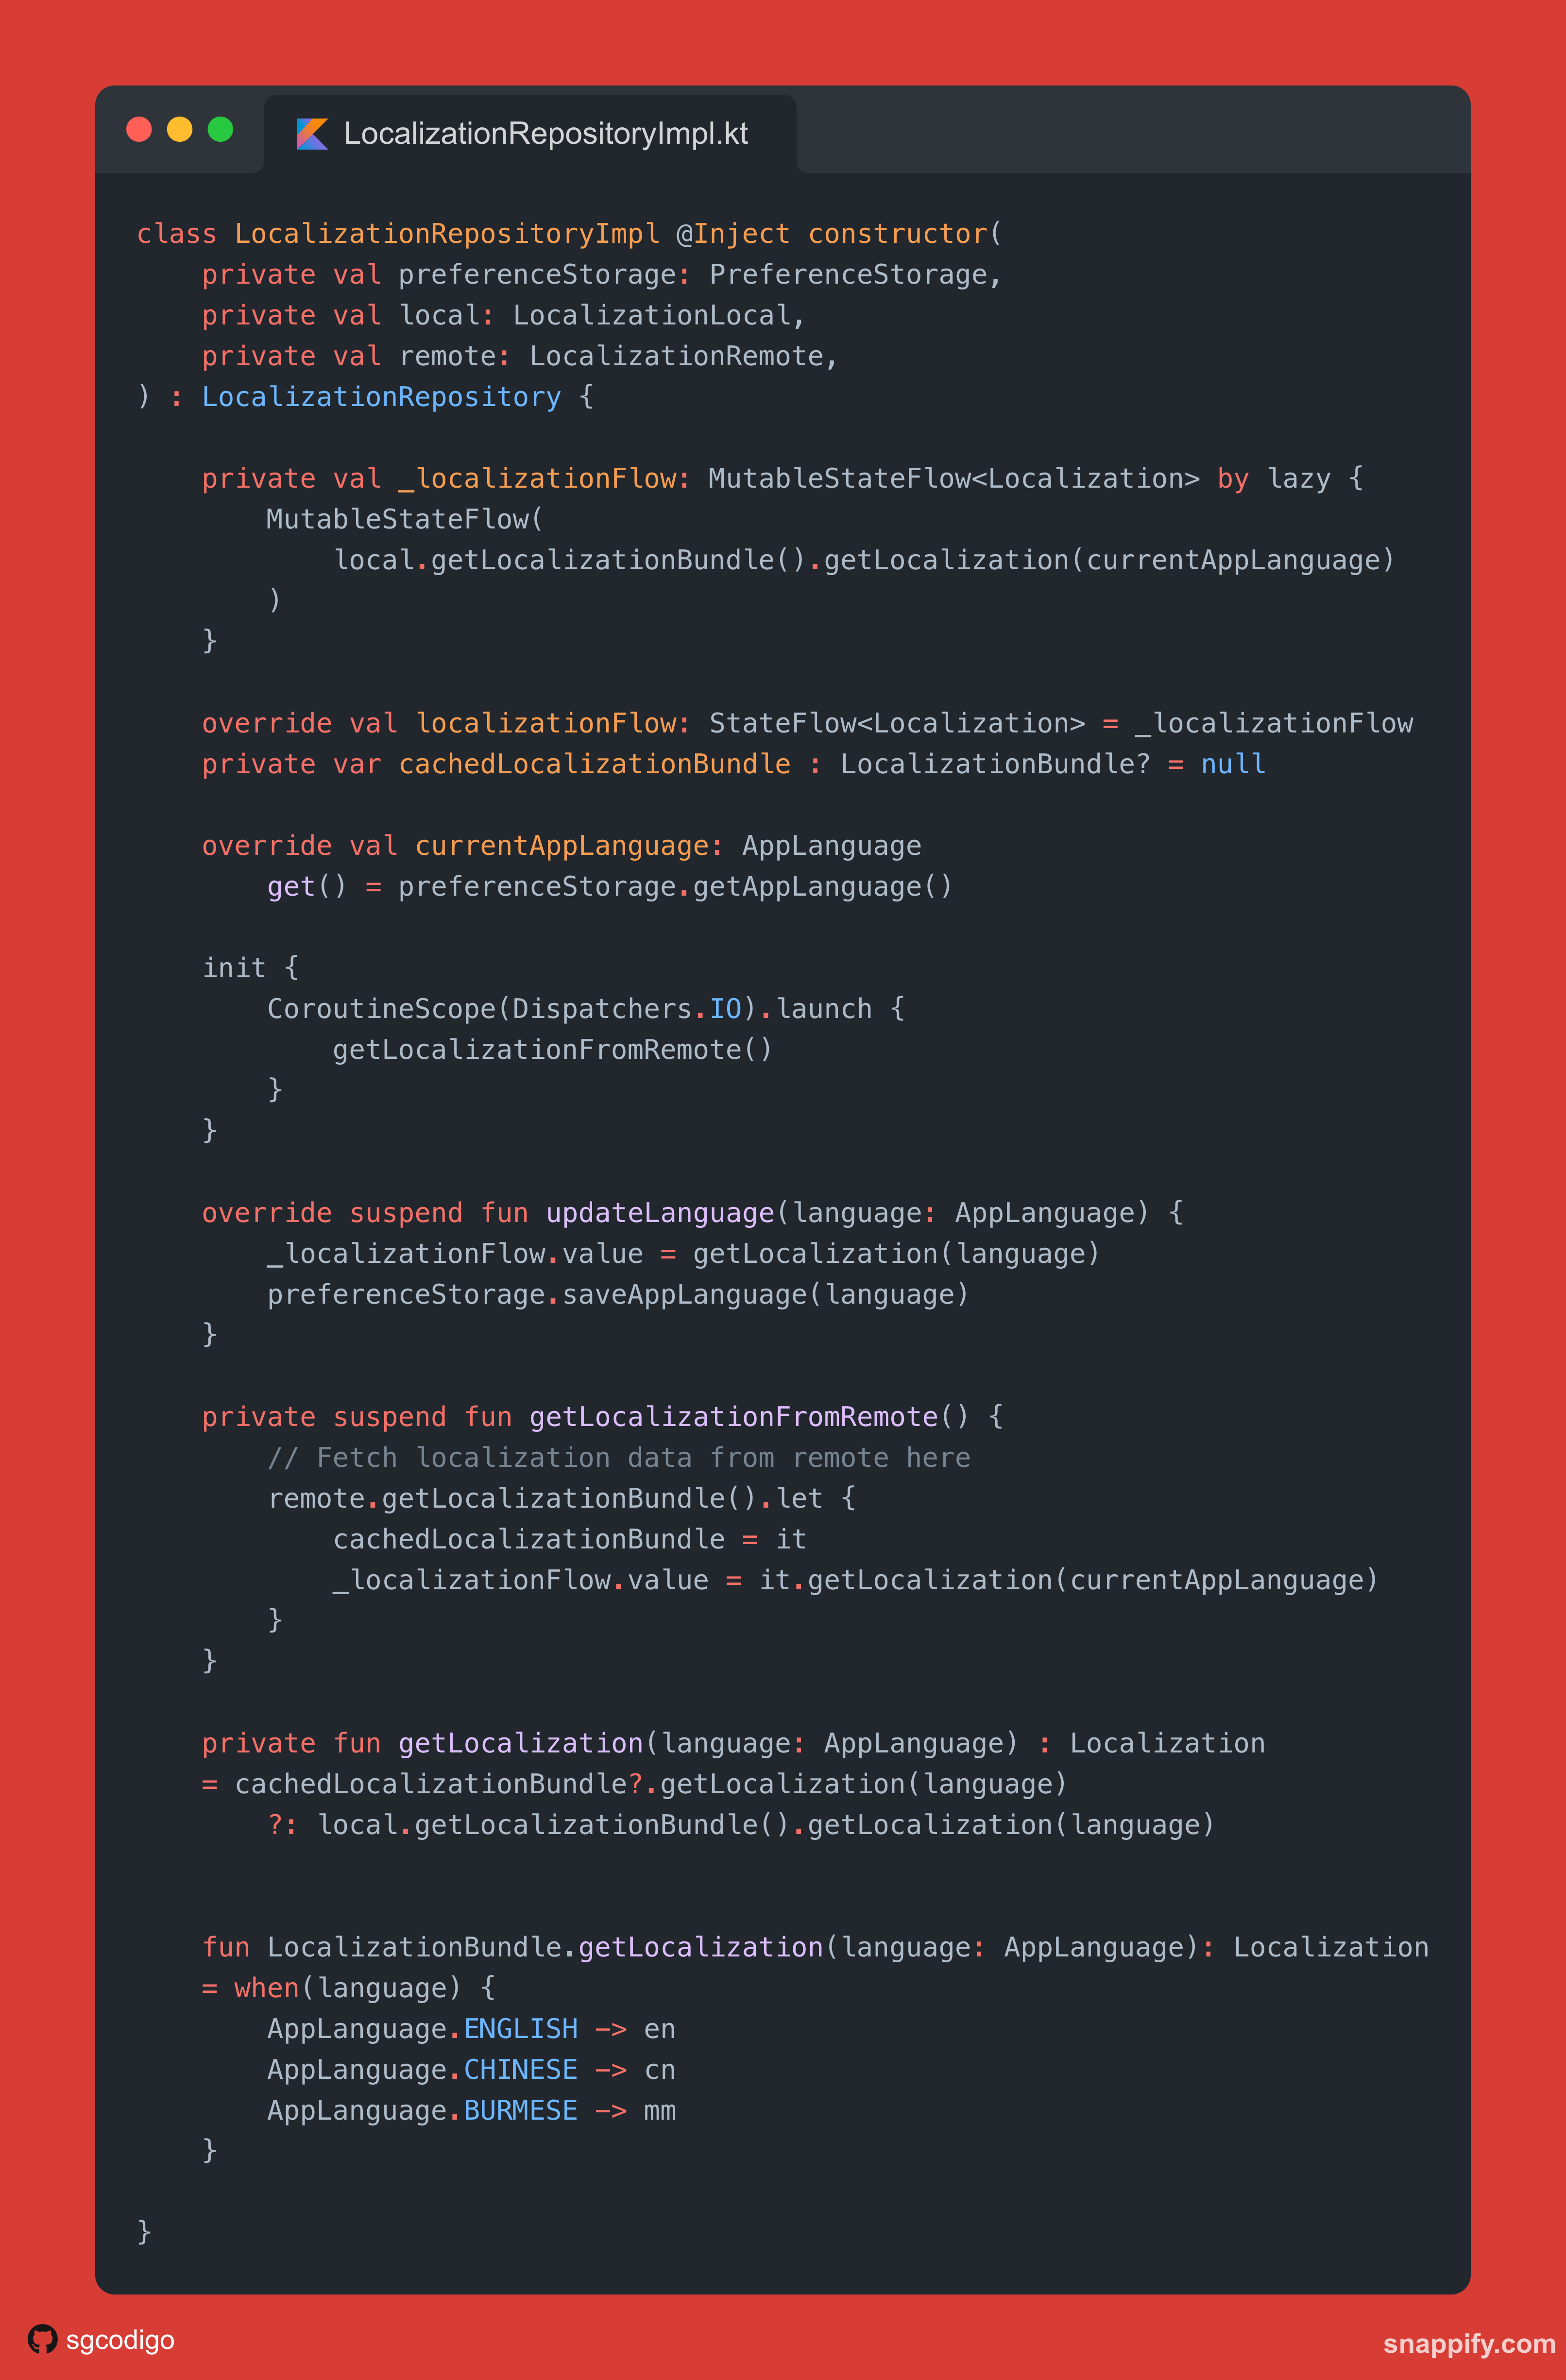
There’s a lot going on here! Let me break it down a bit for you.
- First, we have our Flows and cached states set up. You’ll see private and public flows here. The private one’s a MutableStateFlow and the public one’s just a StateFlow. This way, we restrict external classes from modifying our state.
- updateLanguage function emits the respective language localization object and saves in SharedPreference
- We have helper functions named getLocalization and LocalizationBundle.getLocalization().The former returns either the cached Translations or the one from localization.json, if the cache is empty. The latter extracts the correct localisation object from a LocalizationBundle for the selected language.
- getLocalizationFromRemote() shows the example of fetching Localization from a remote Localization.
Local Data Source
You can see the implementation of LocalizationLocal classes below.
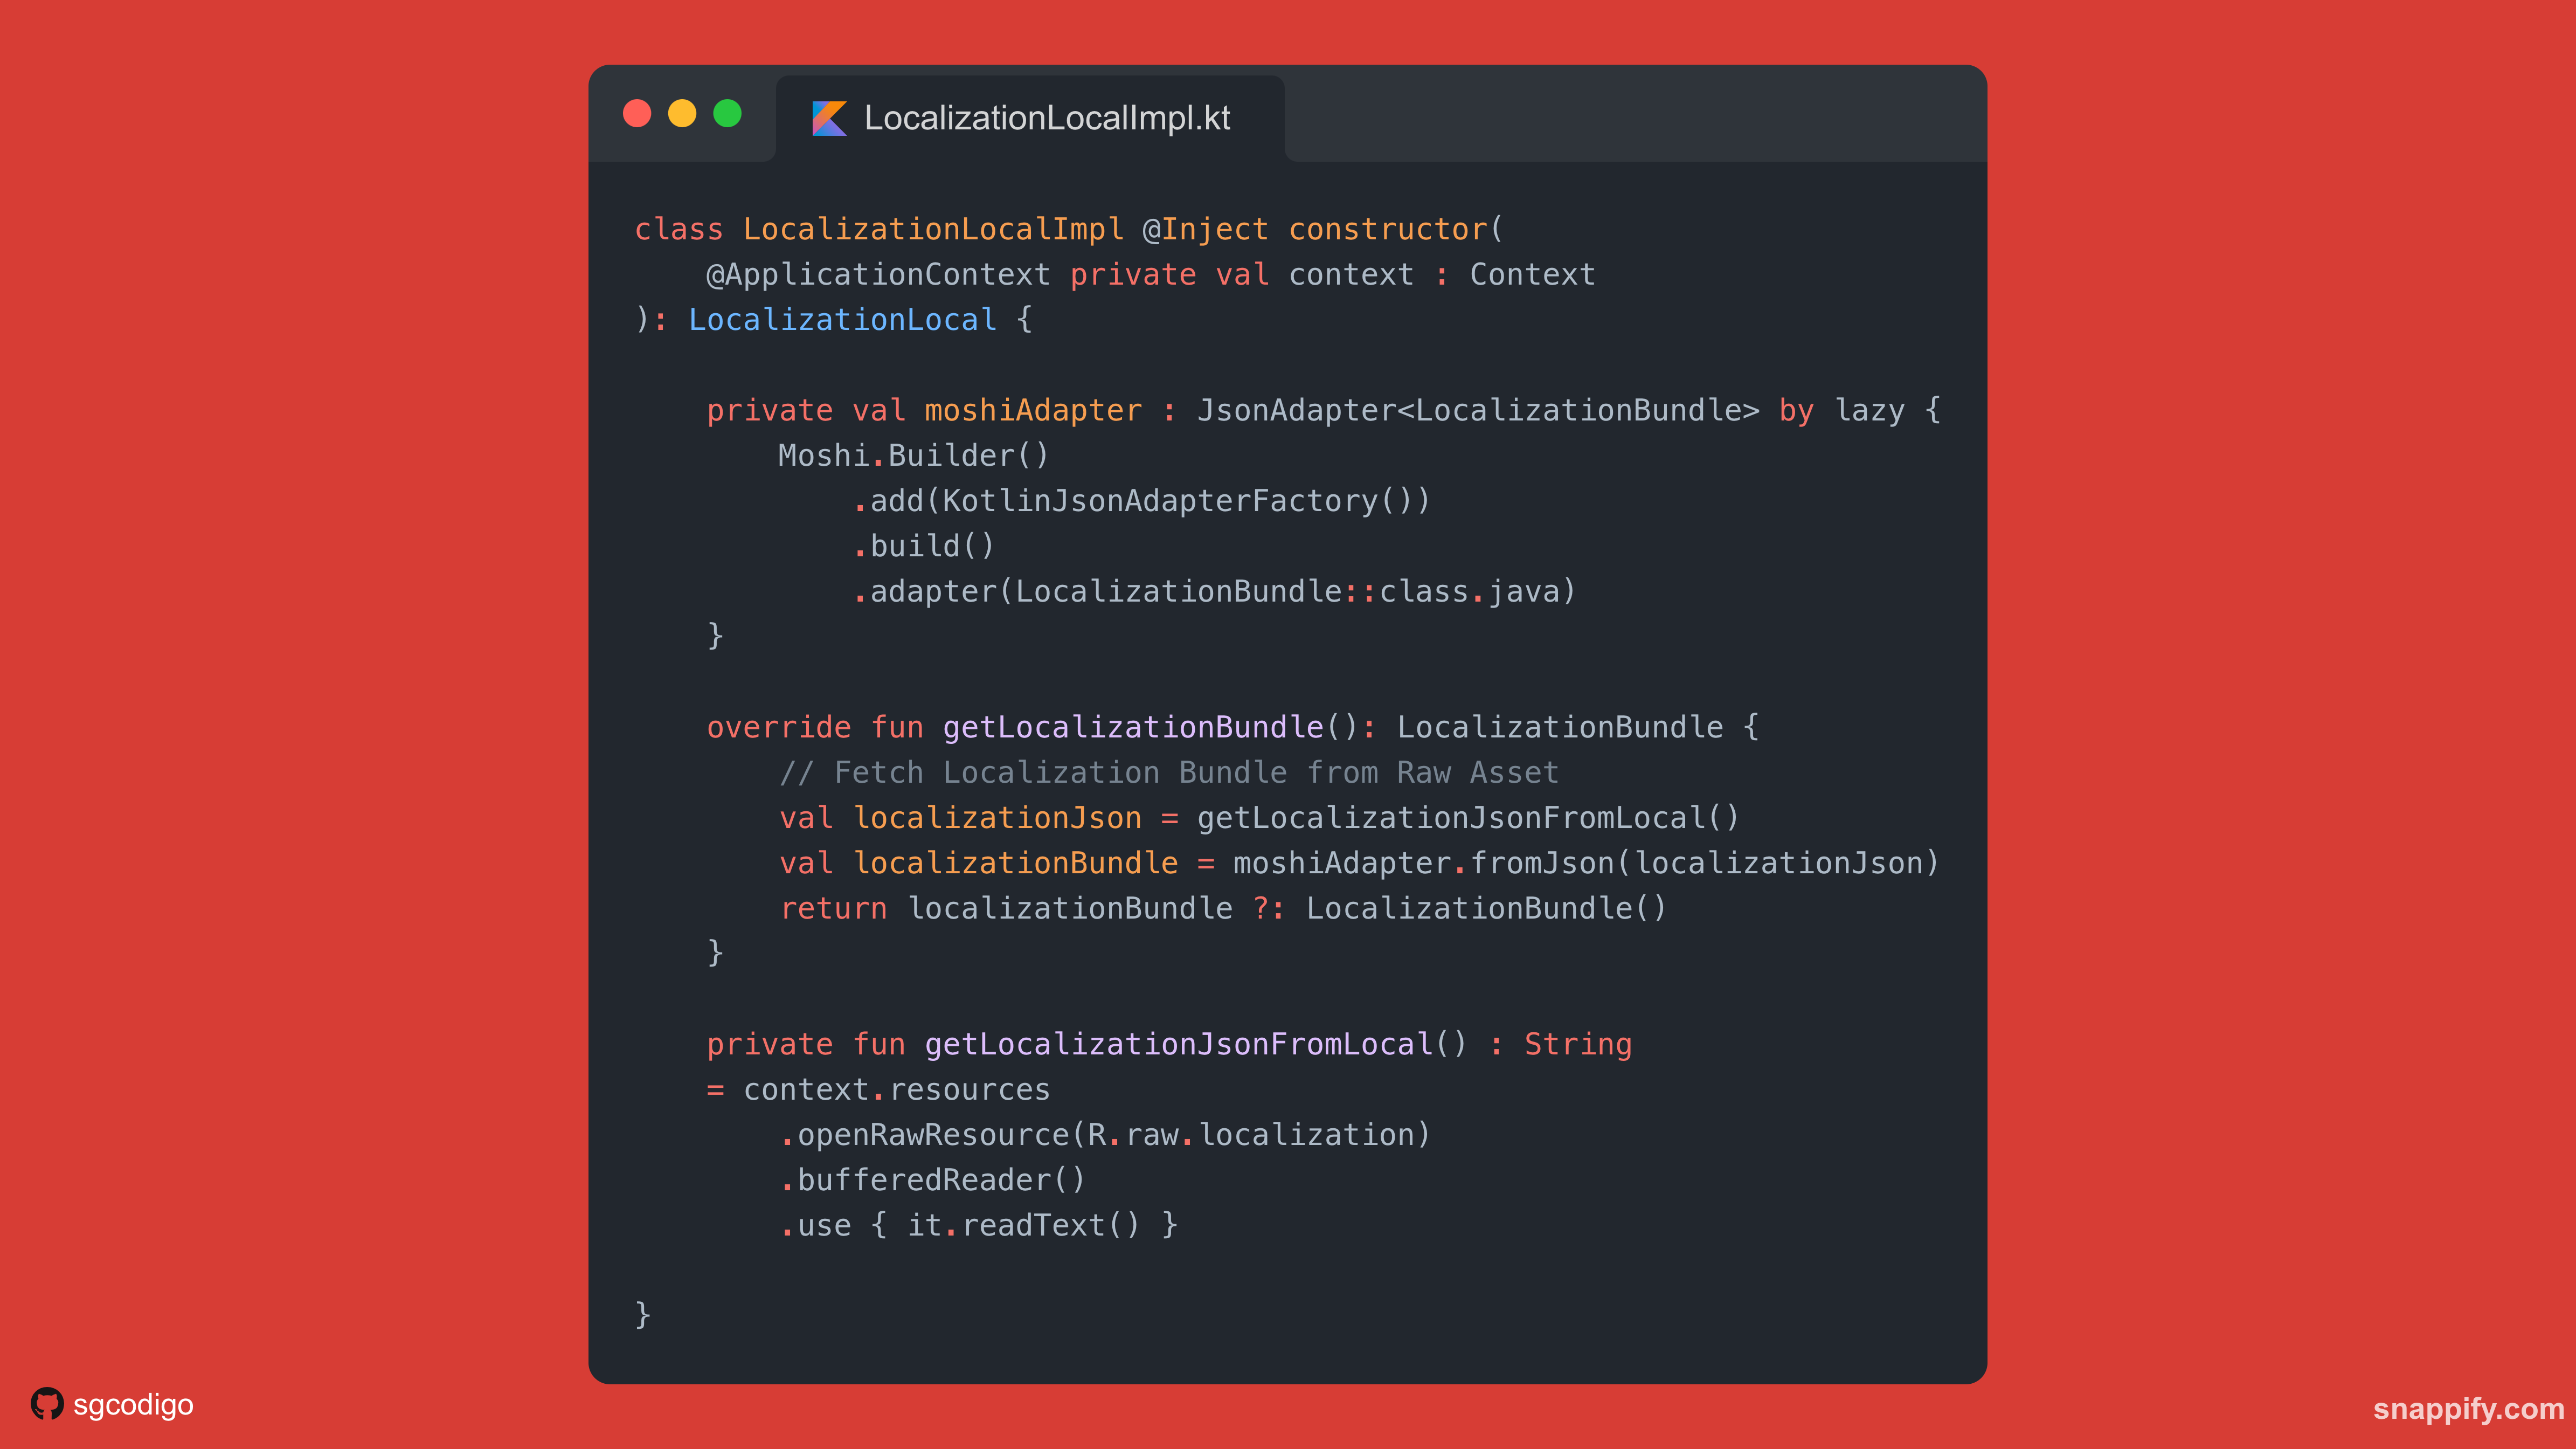
It basically deserializes the localization.json file from Raw Asset into a LocalizationBundle.
View Model
Now that our LocalizationRepository is ready, we can start integrating it in our ViewModels. We’re going to create an abstract class named LocalizedViewModel as follows…
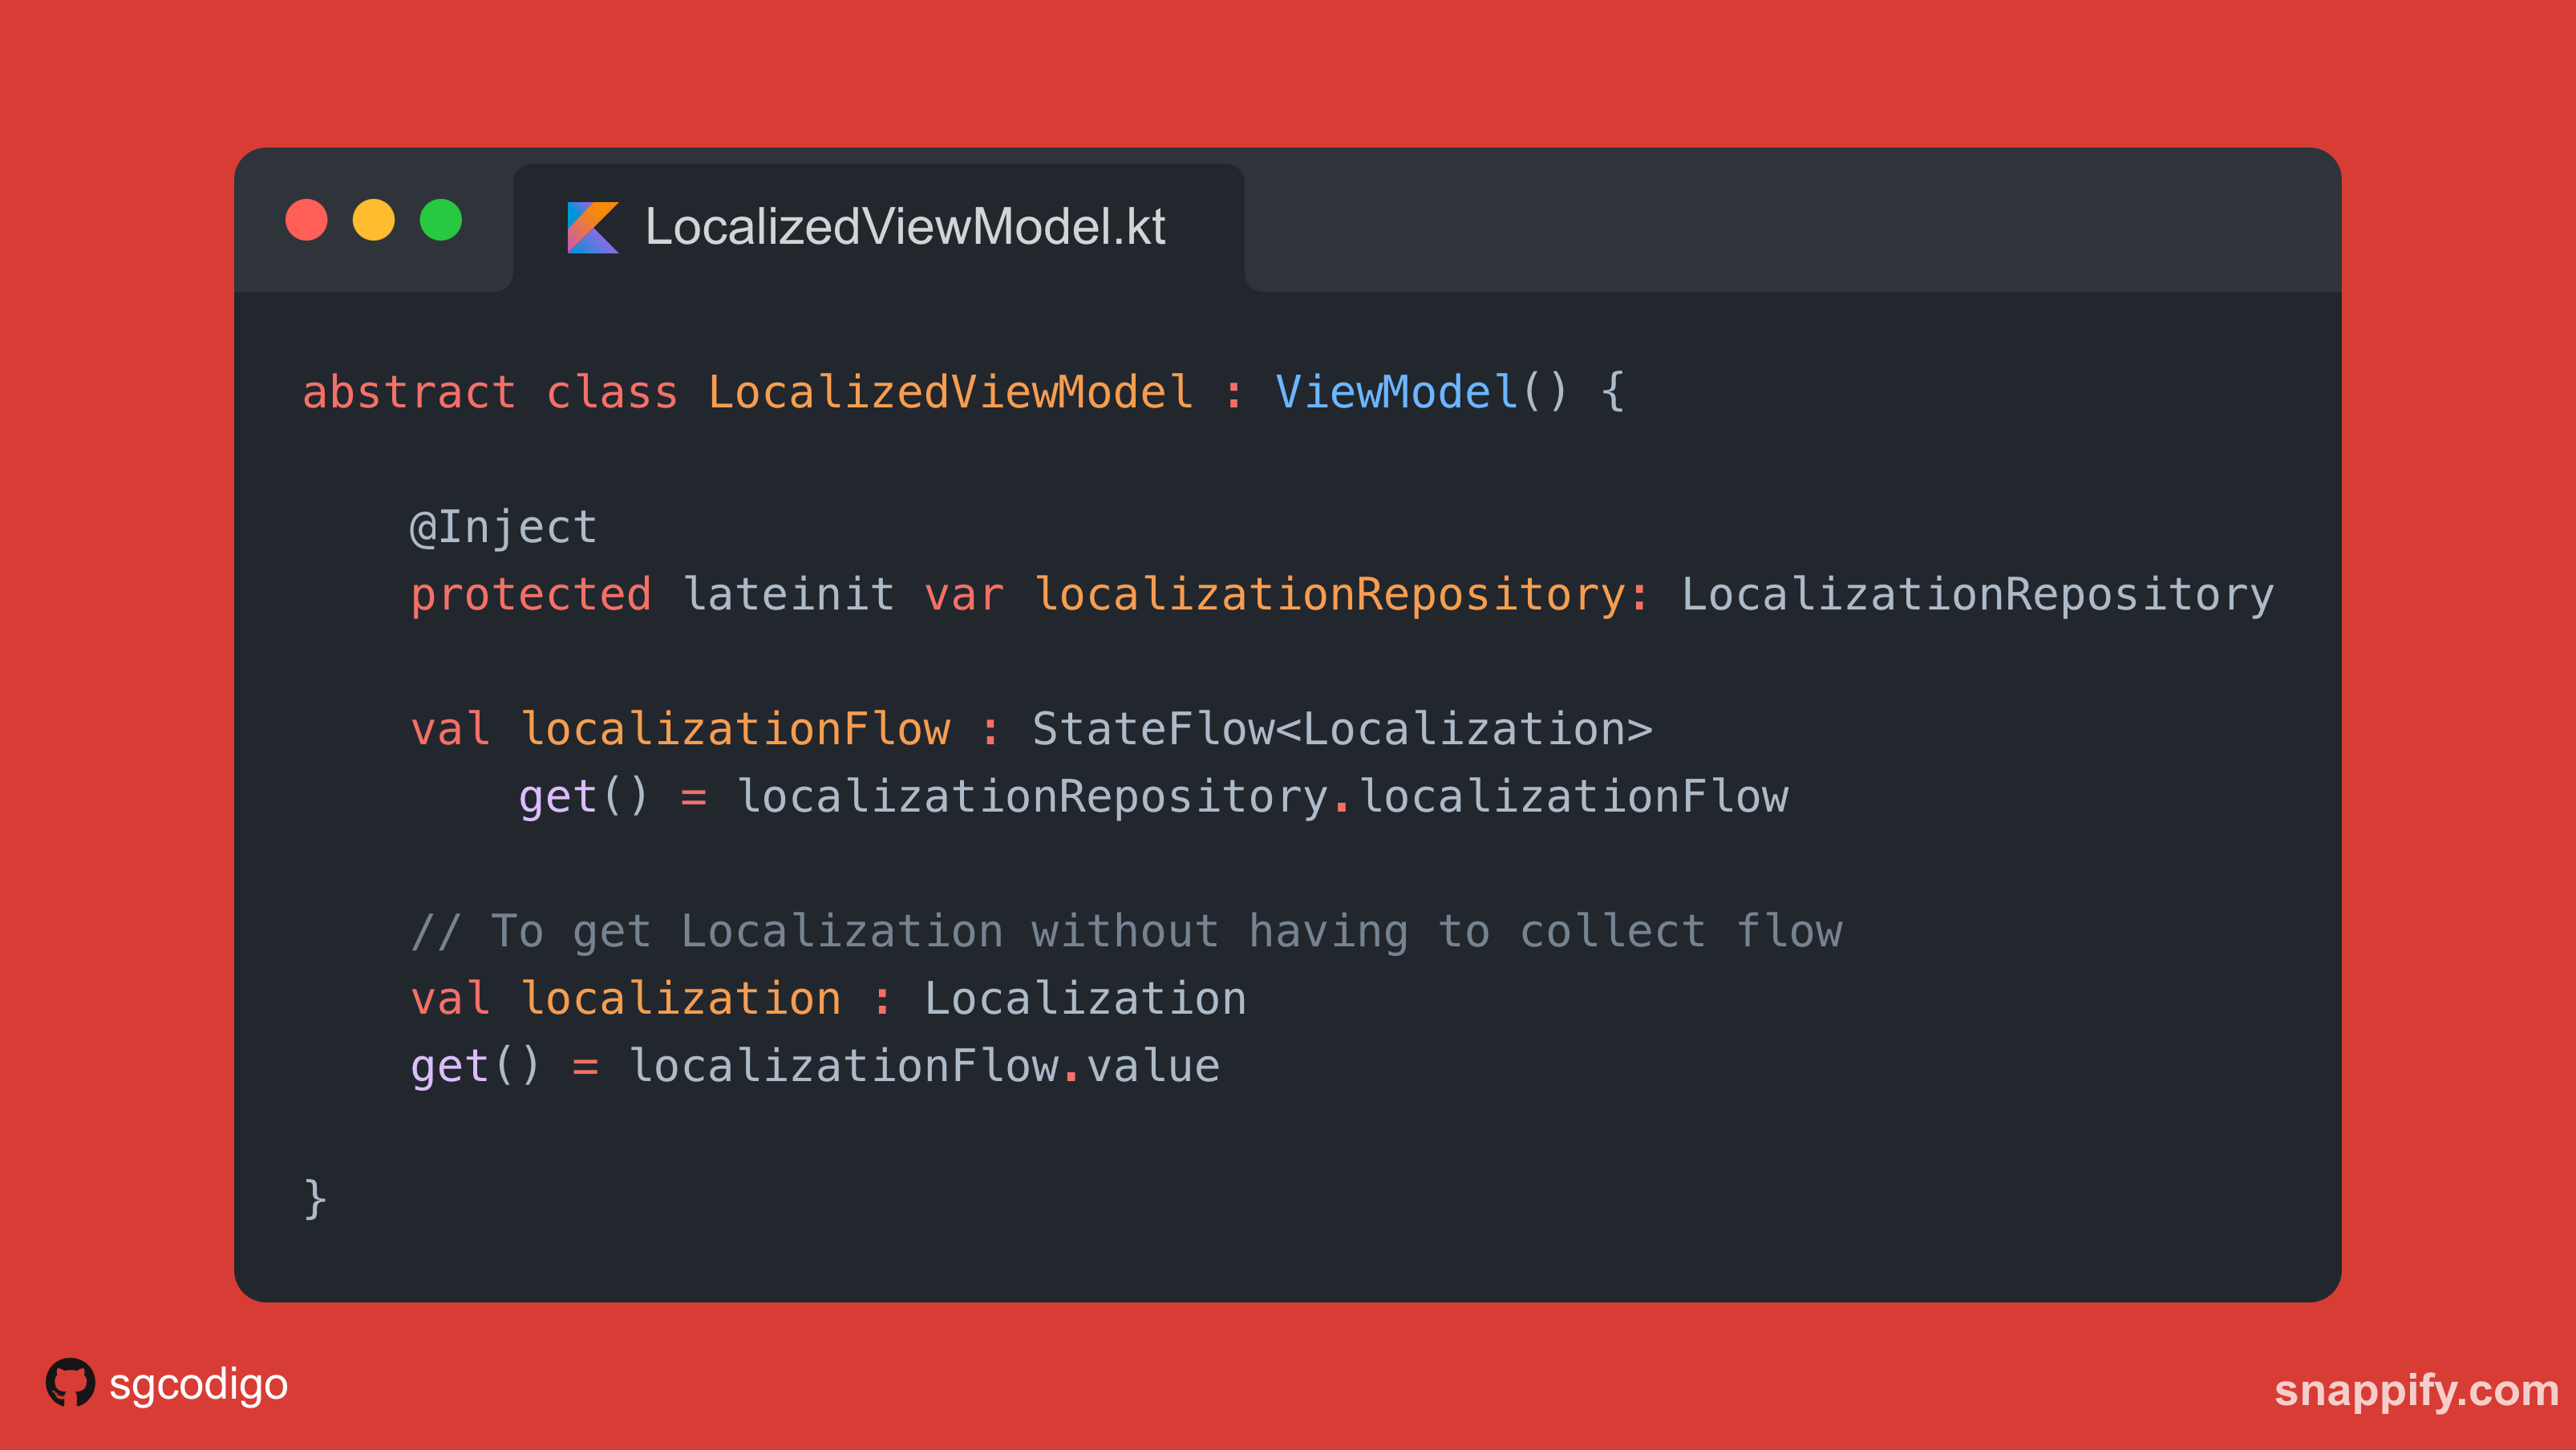
Let’s implement it in UI!
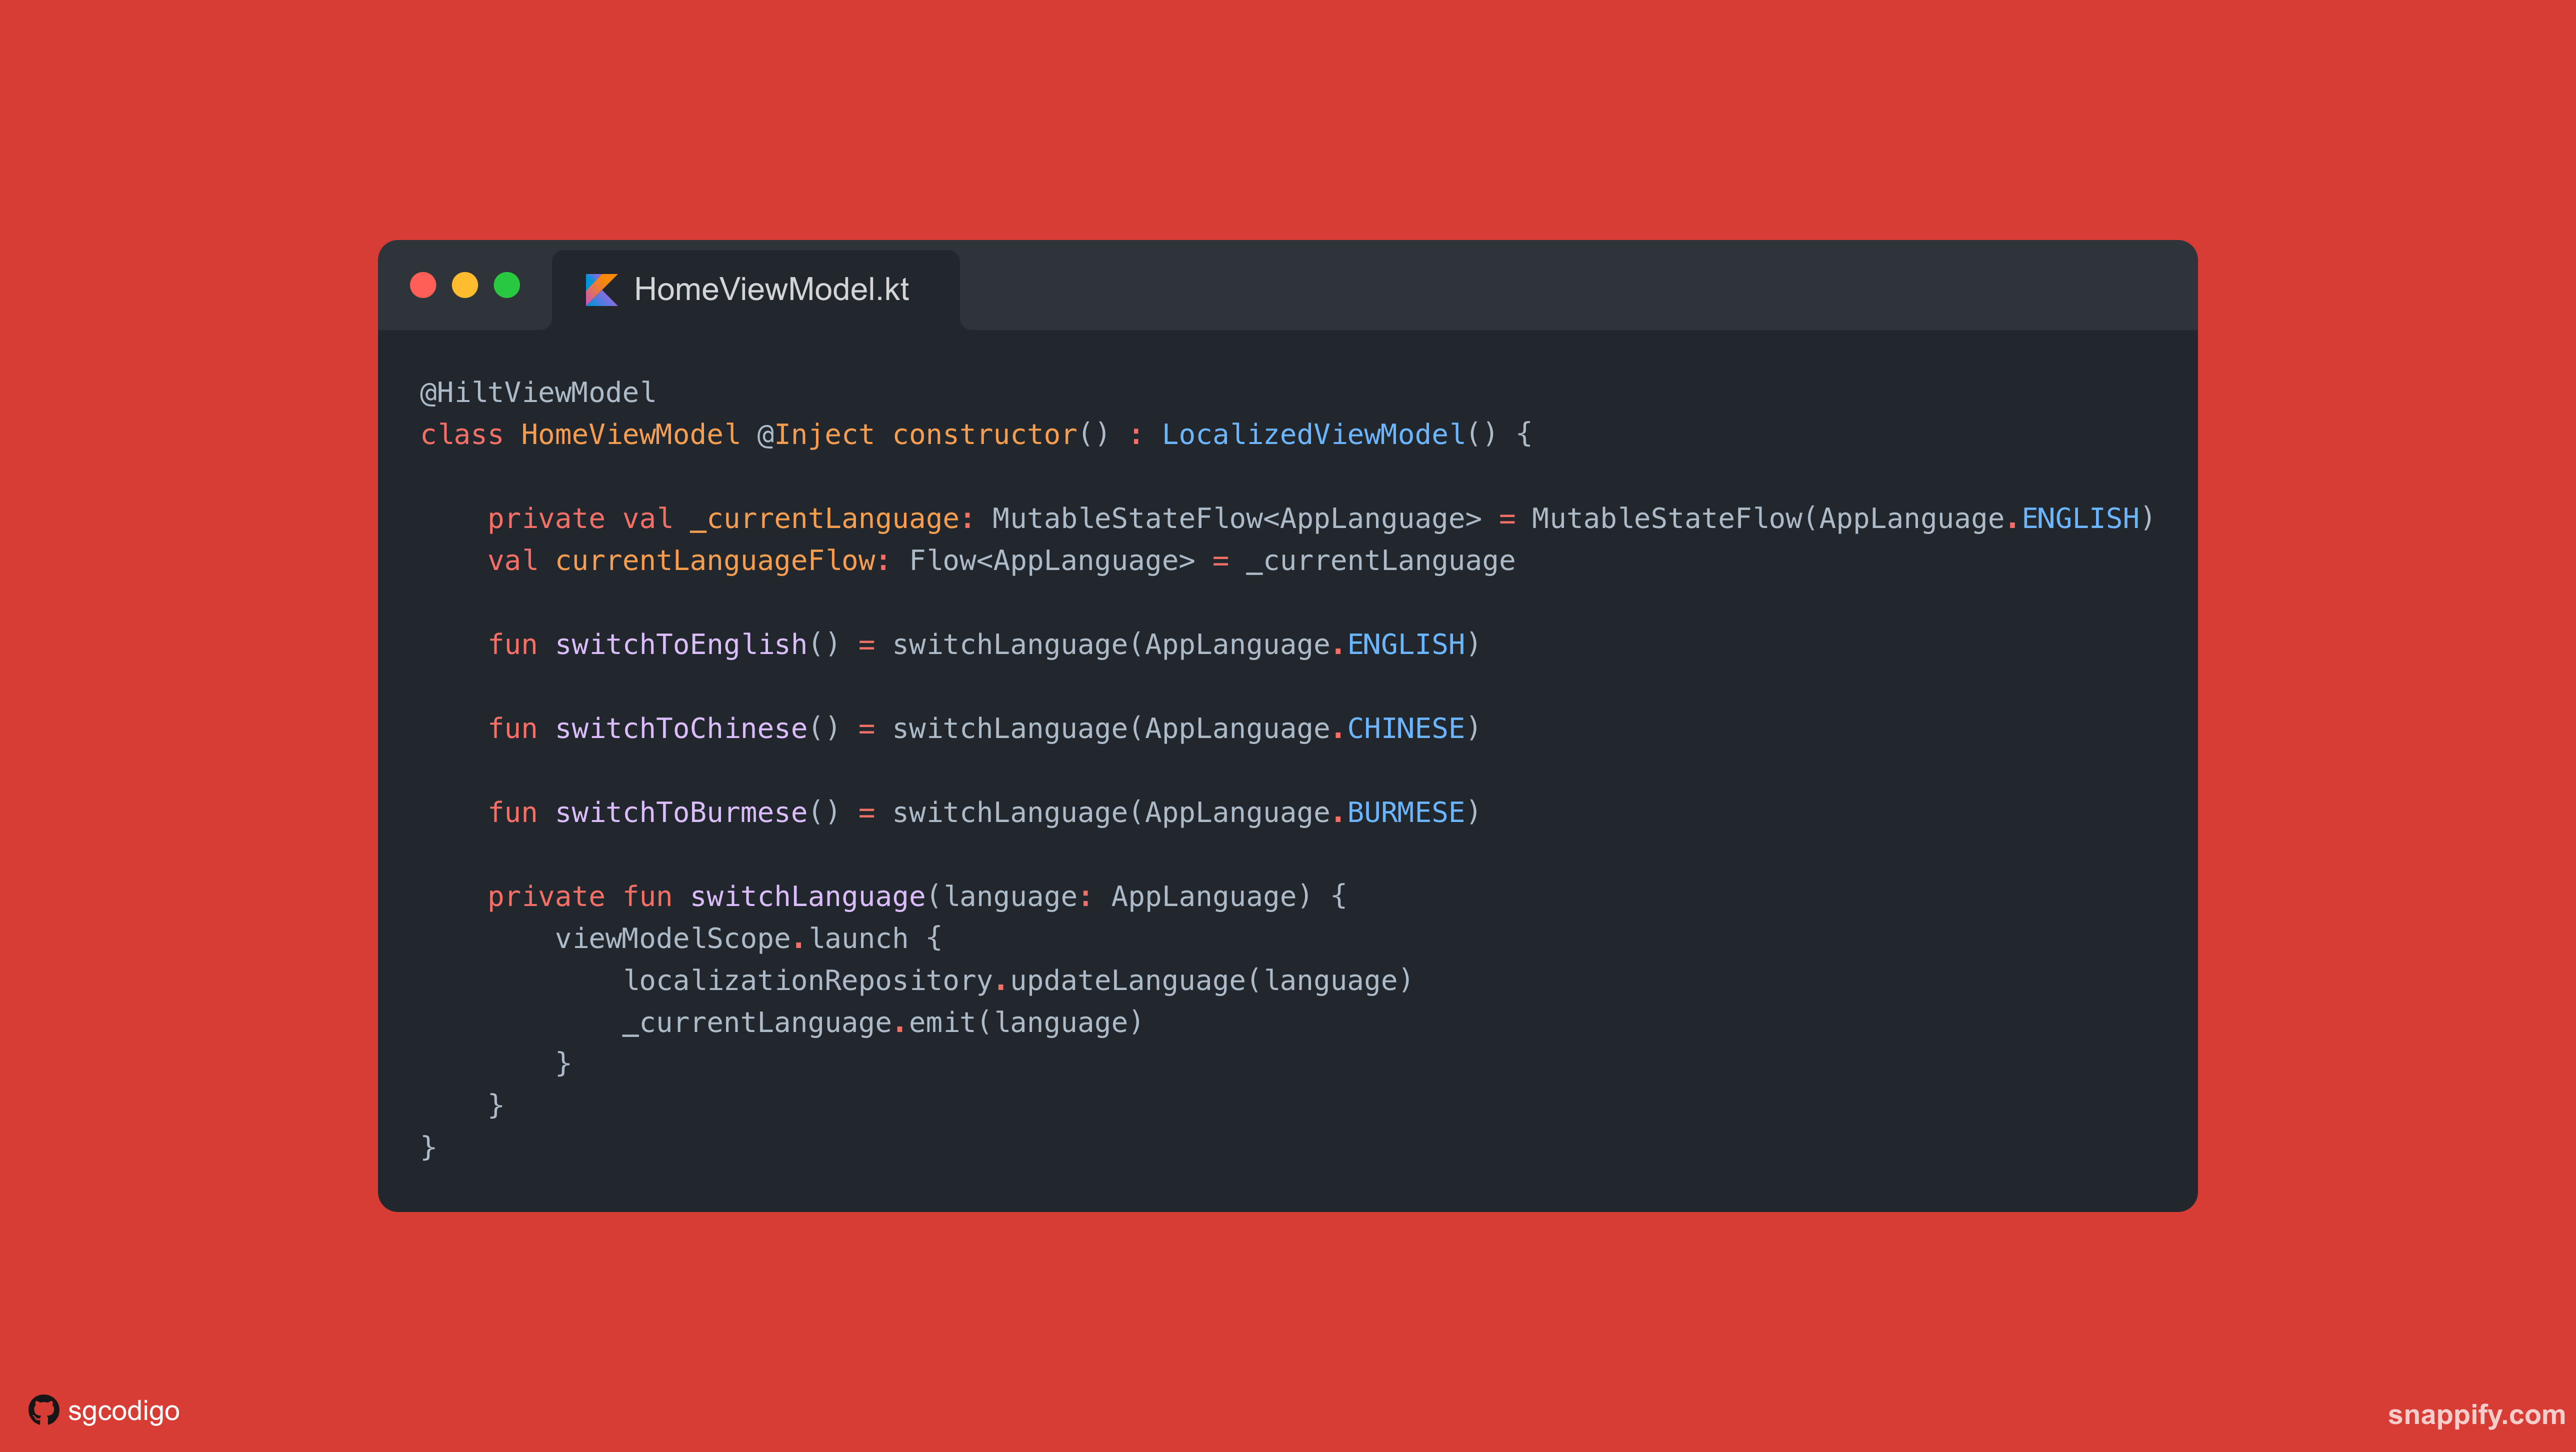
We’ve successfully set up our ViewModels and Repositories. Now we can start consuming the data in our UI! To use the localization data, we just need the ViewModel class to extend LocalizedViewModel .
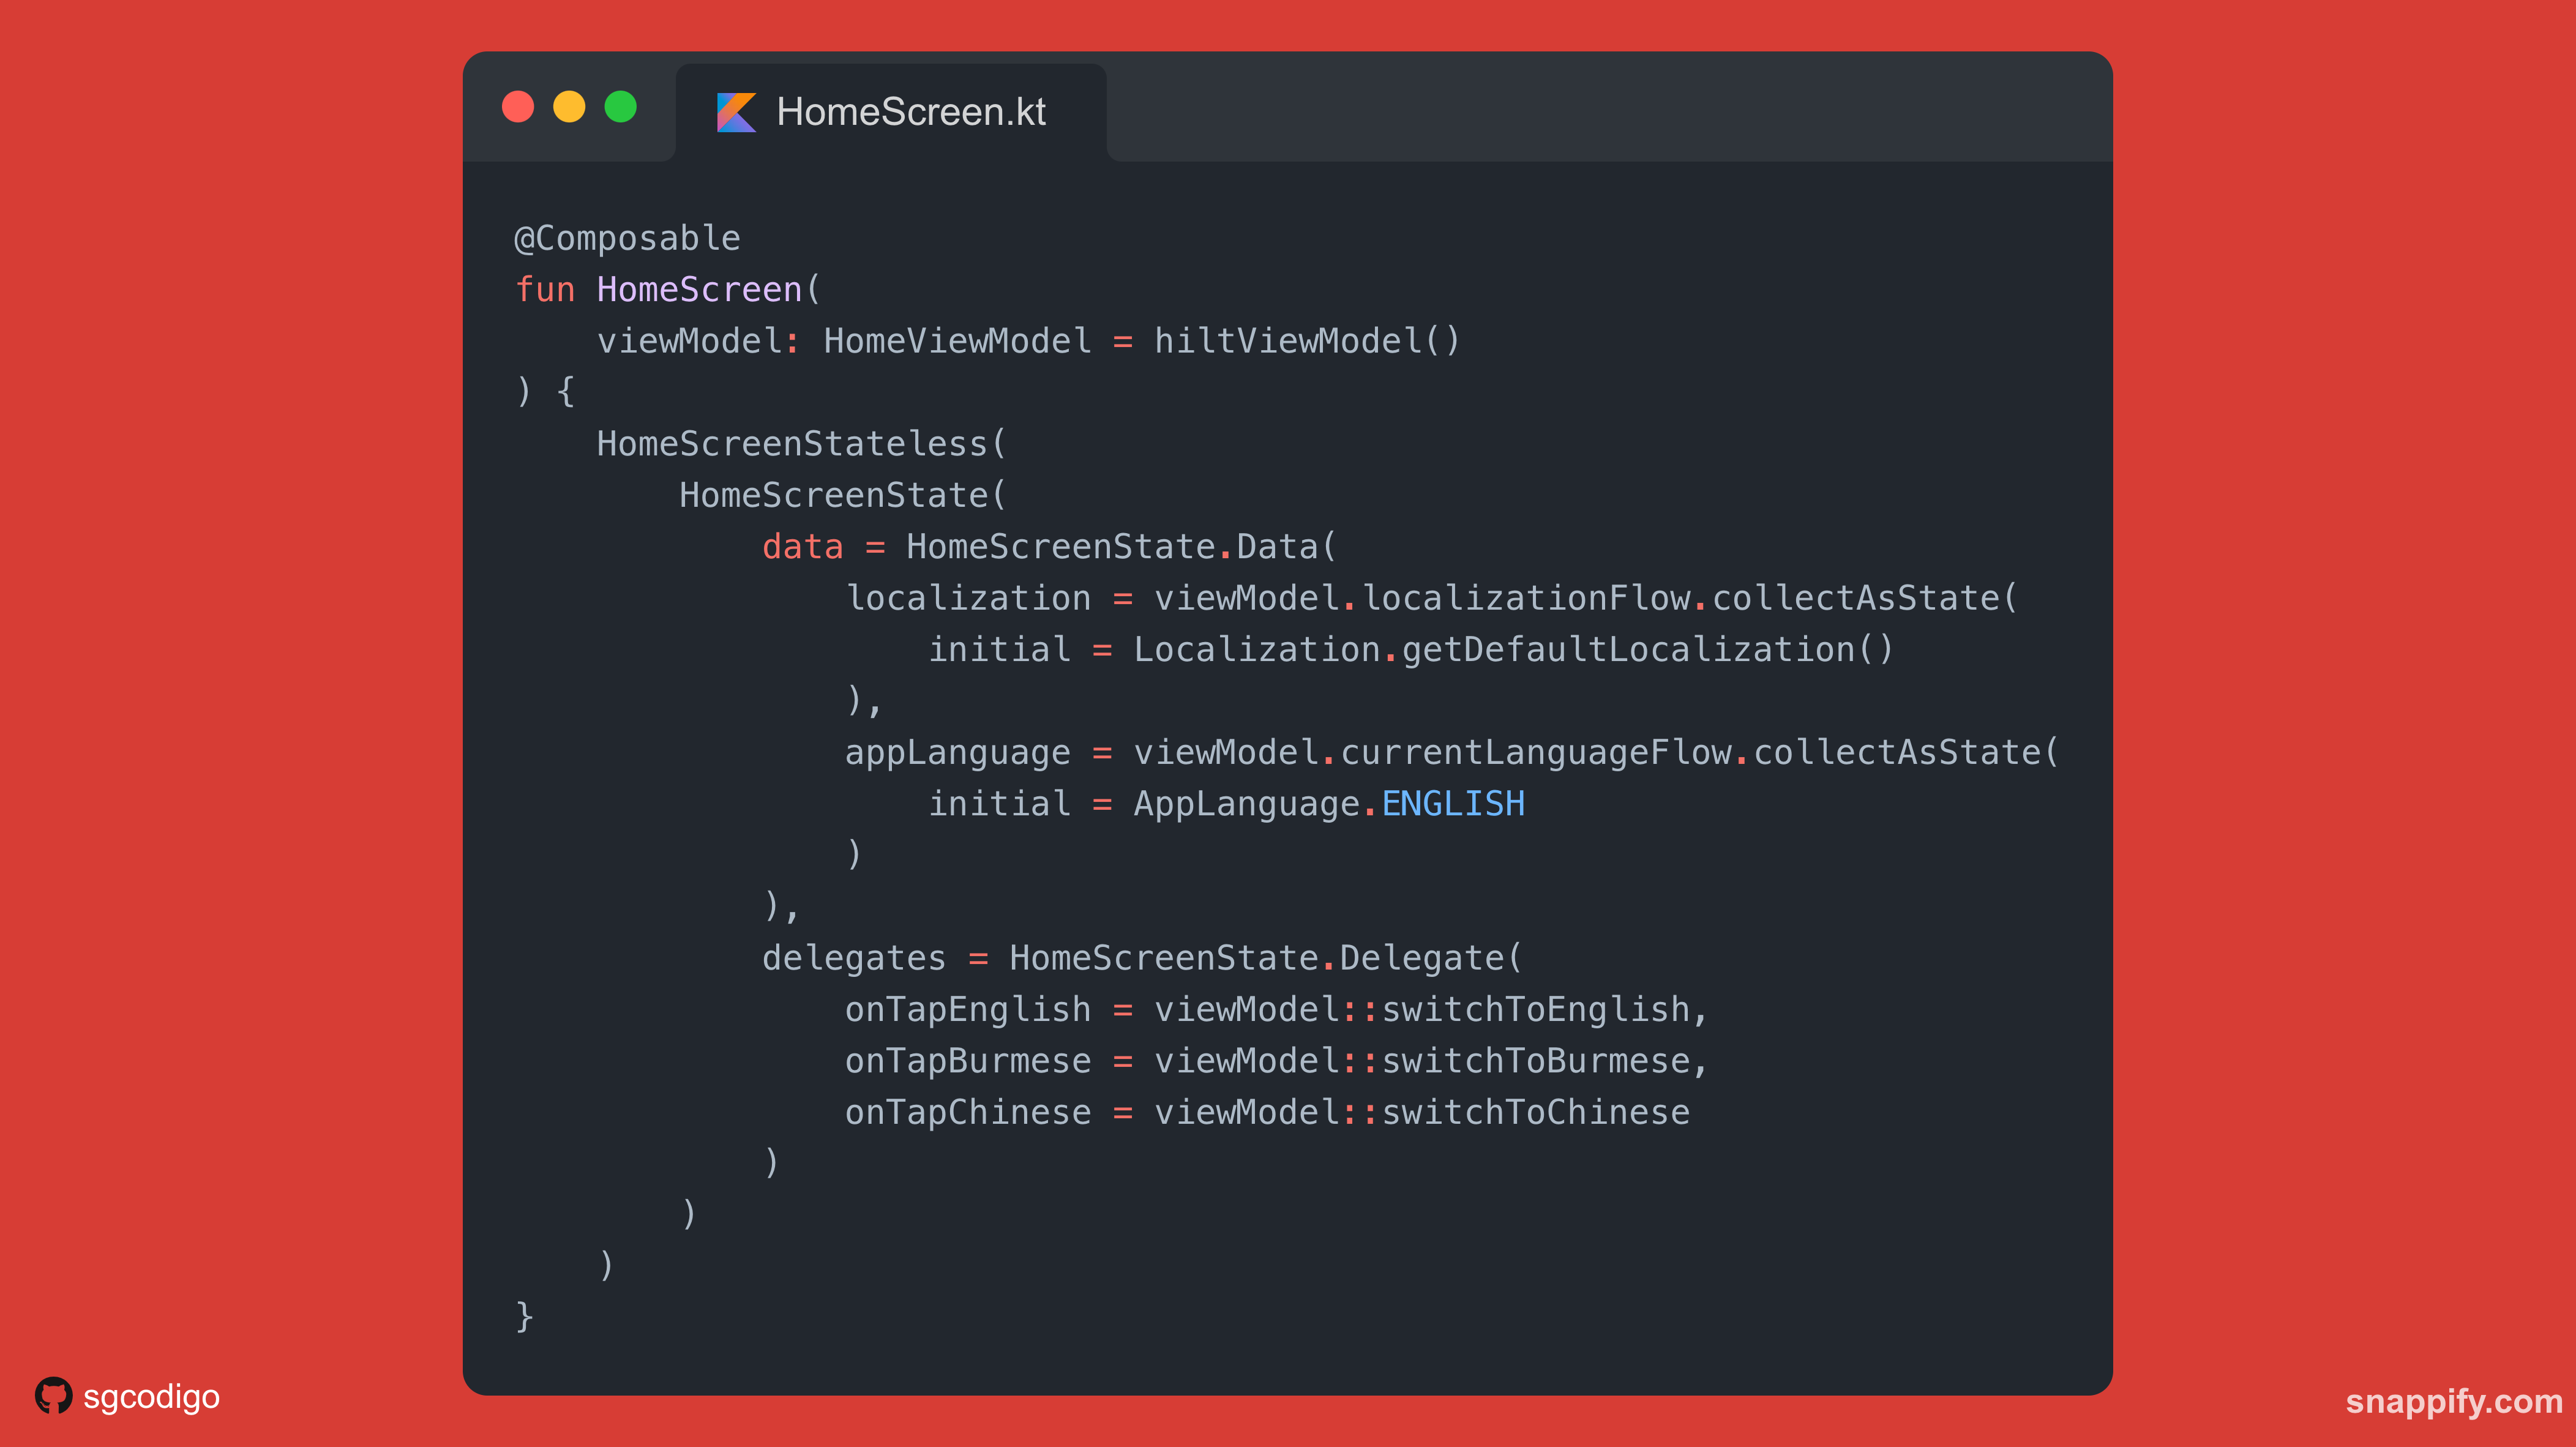
You can see our Demo App’s Home screen implementation below…
Since we’re using Jetpack Compose, we just use collectAsState() extension function to consume the Localization Flow.
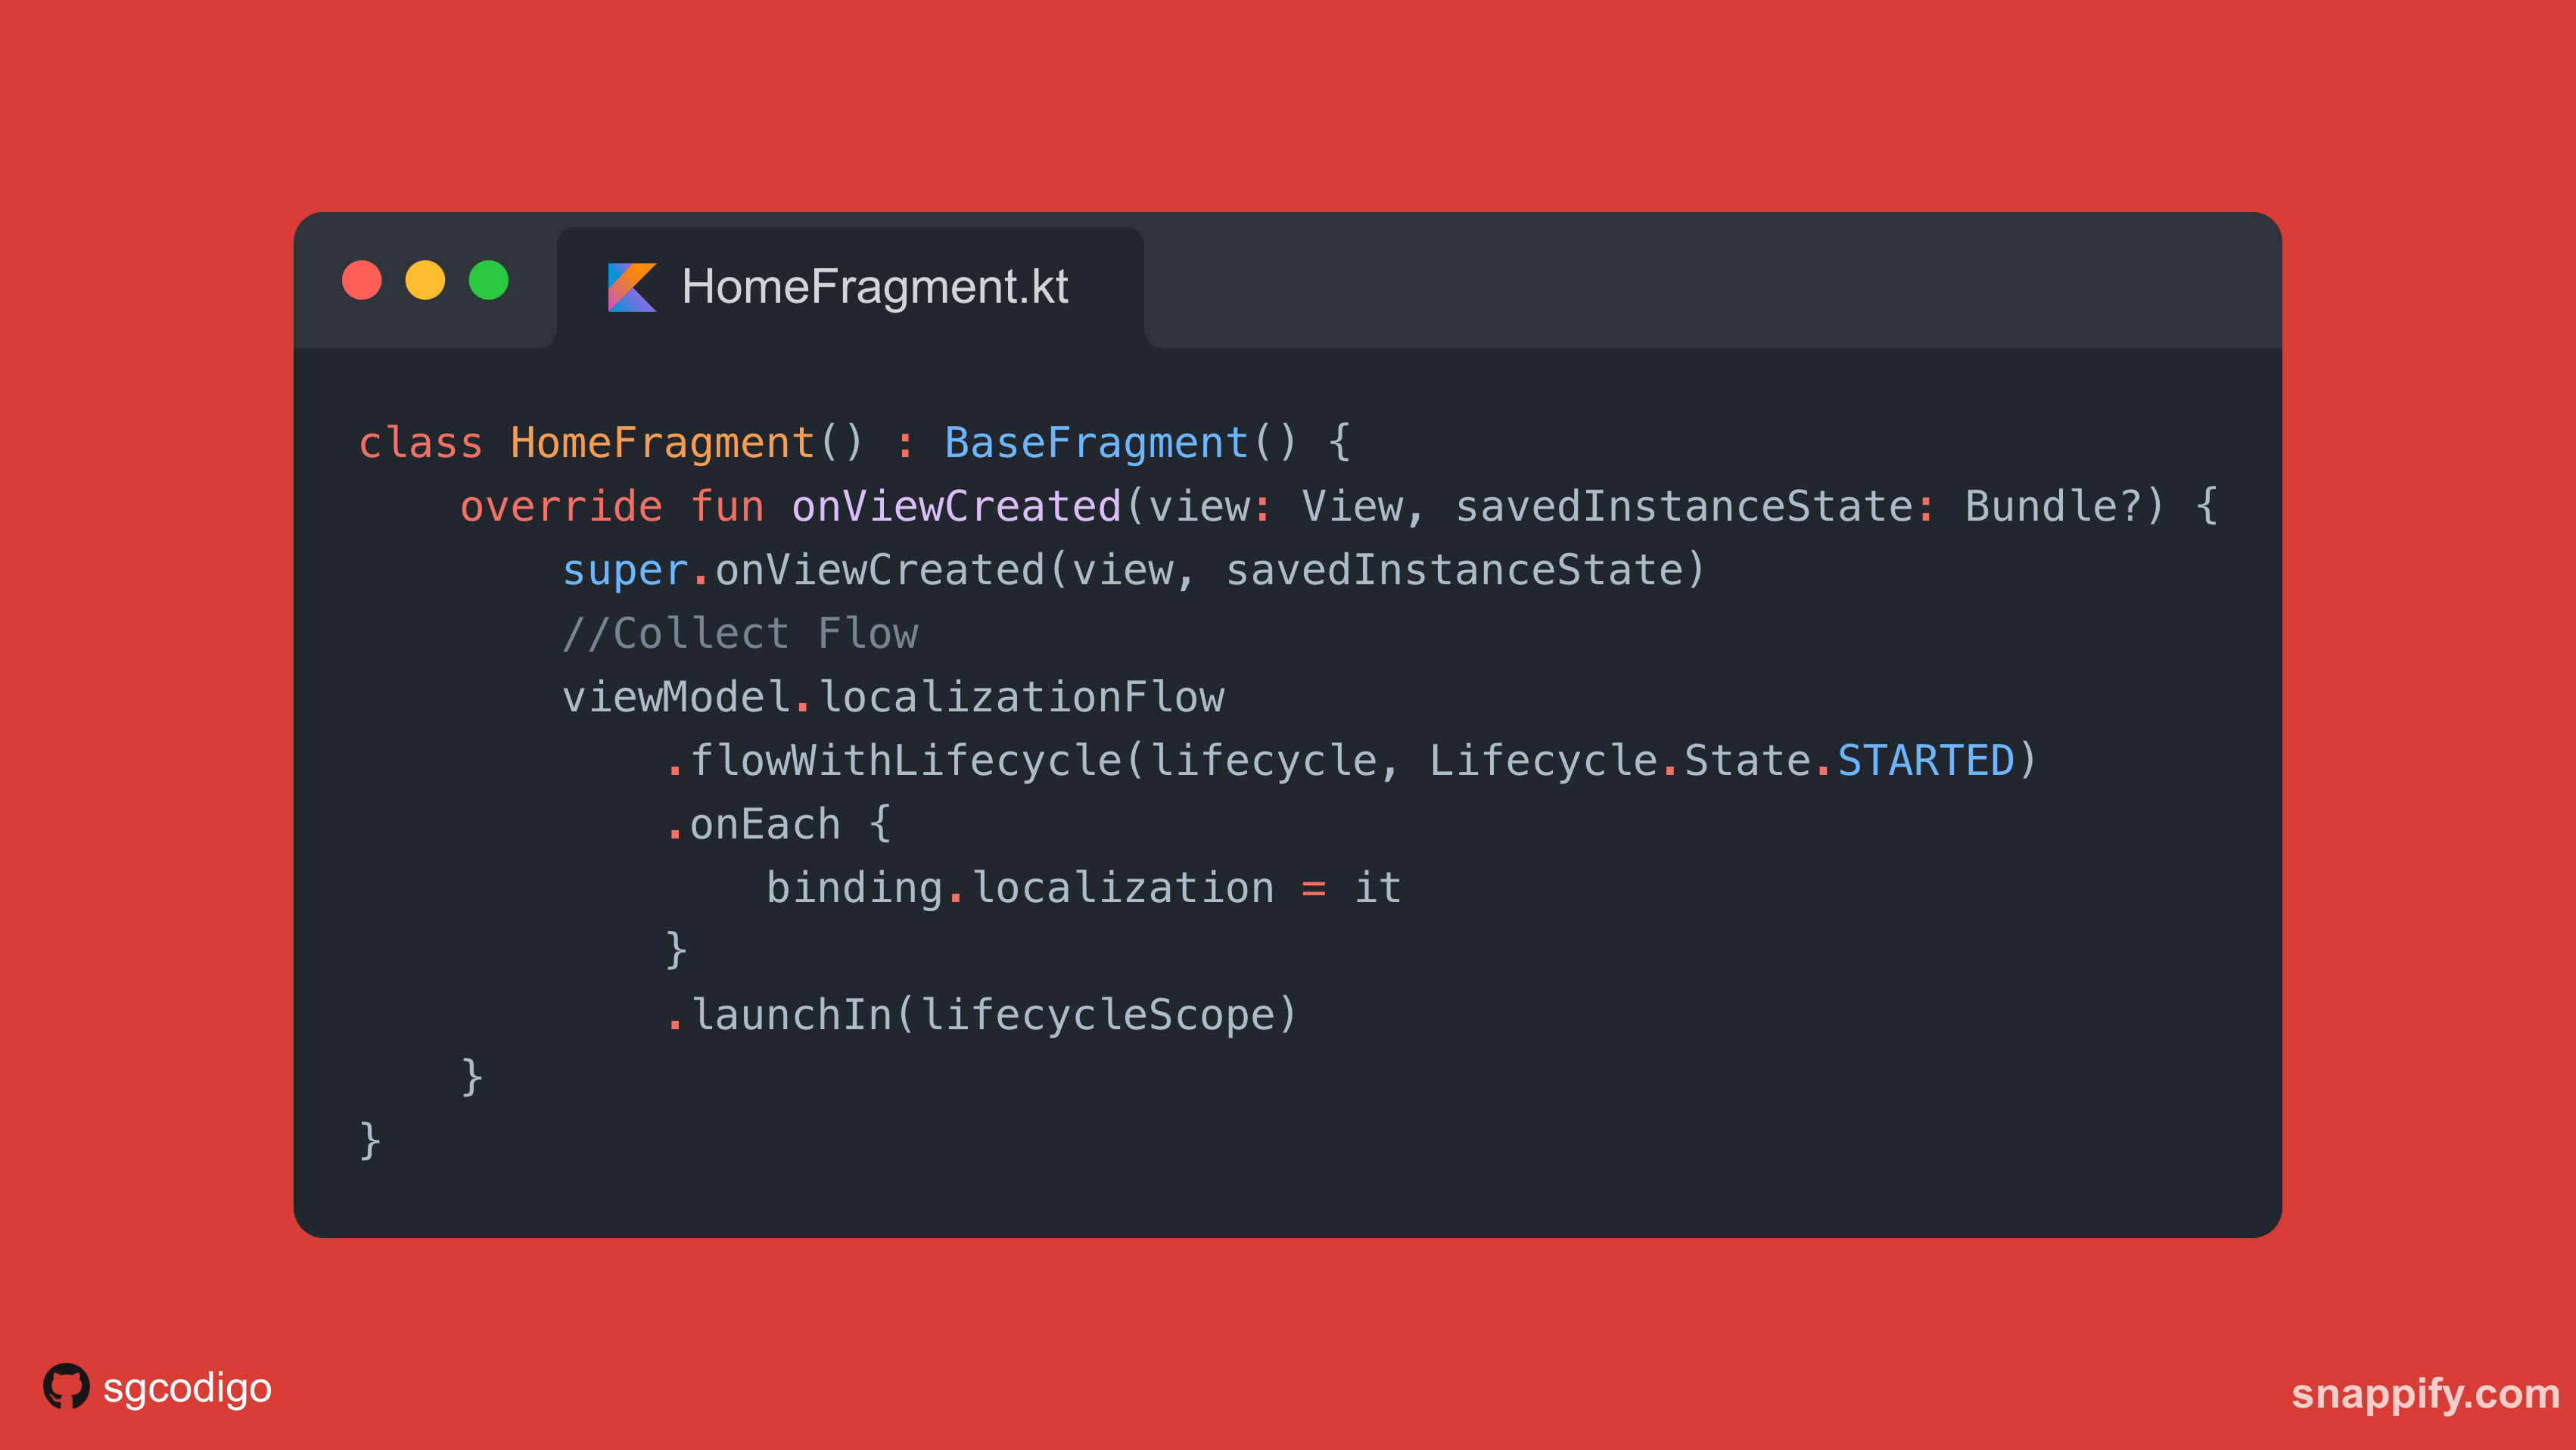
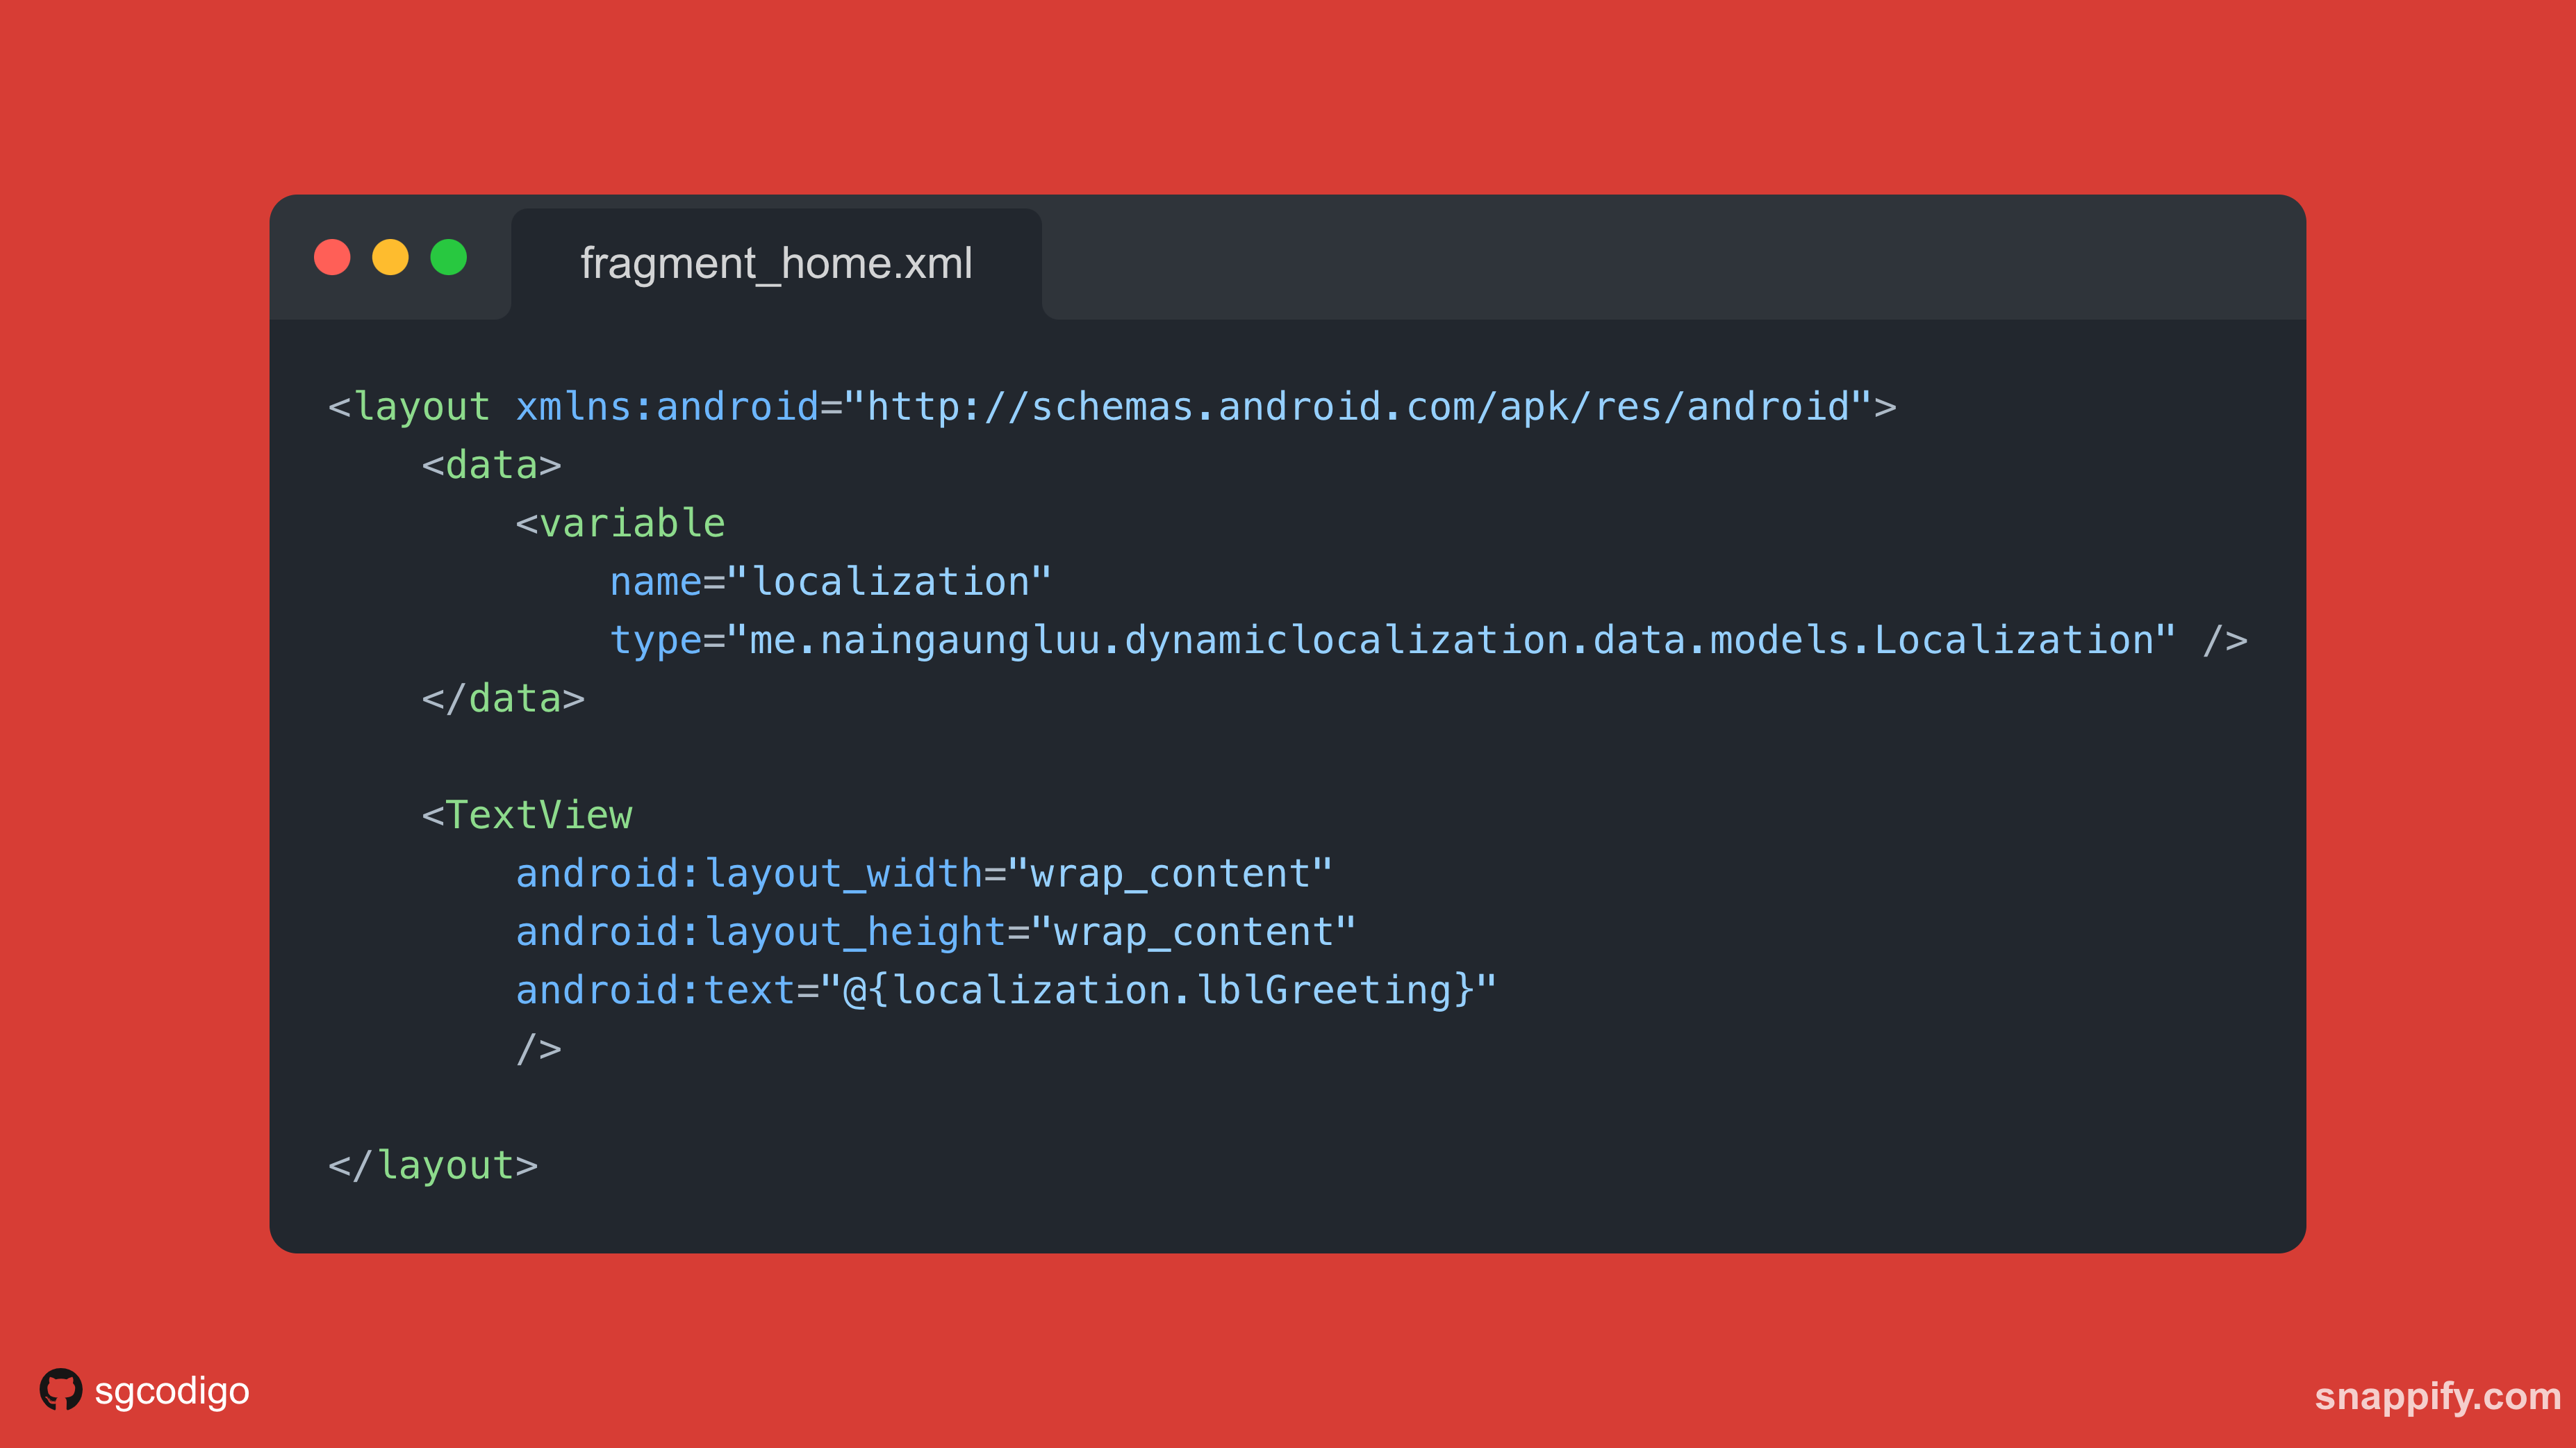
If you use Android’s DataBinding feature, we can bind it easily too!
Cherry On Top with String Templating
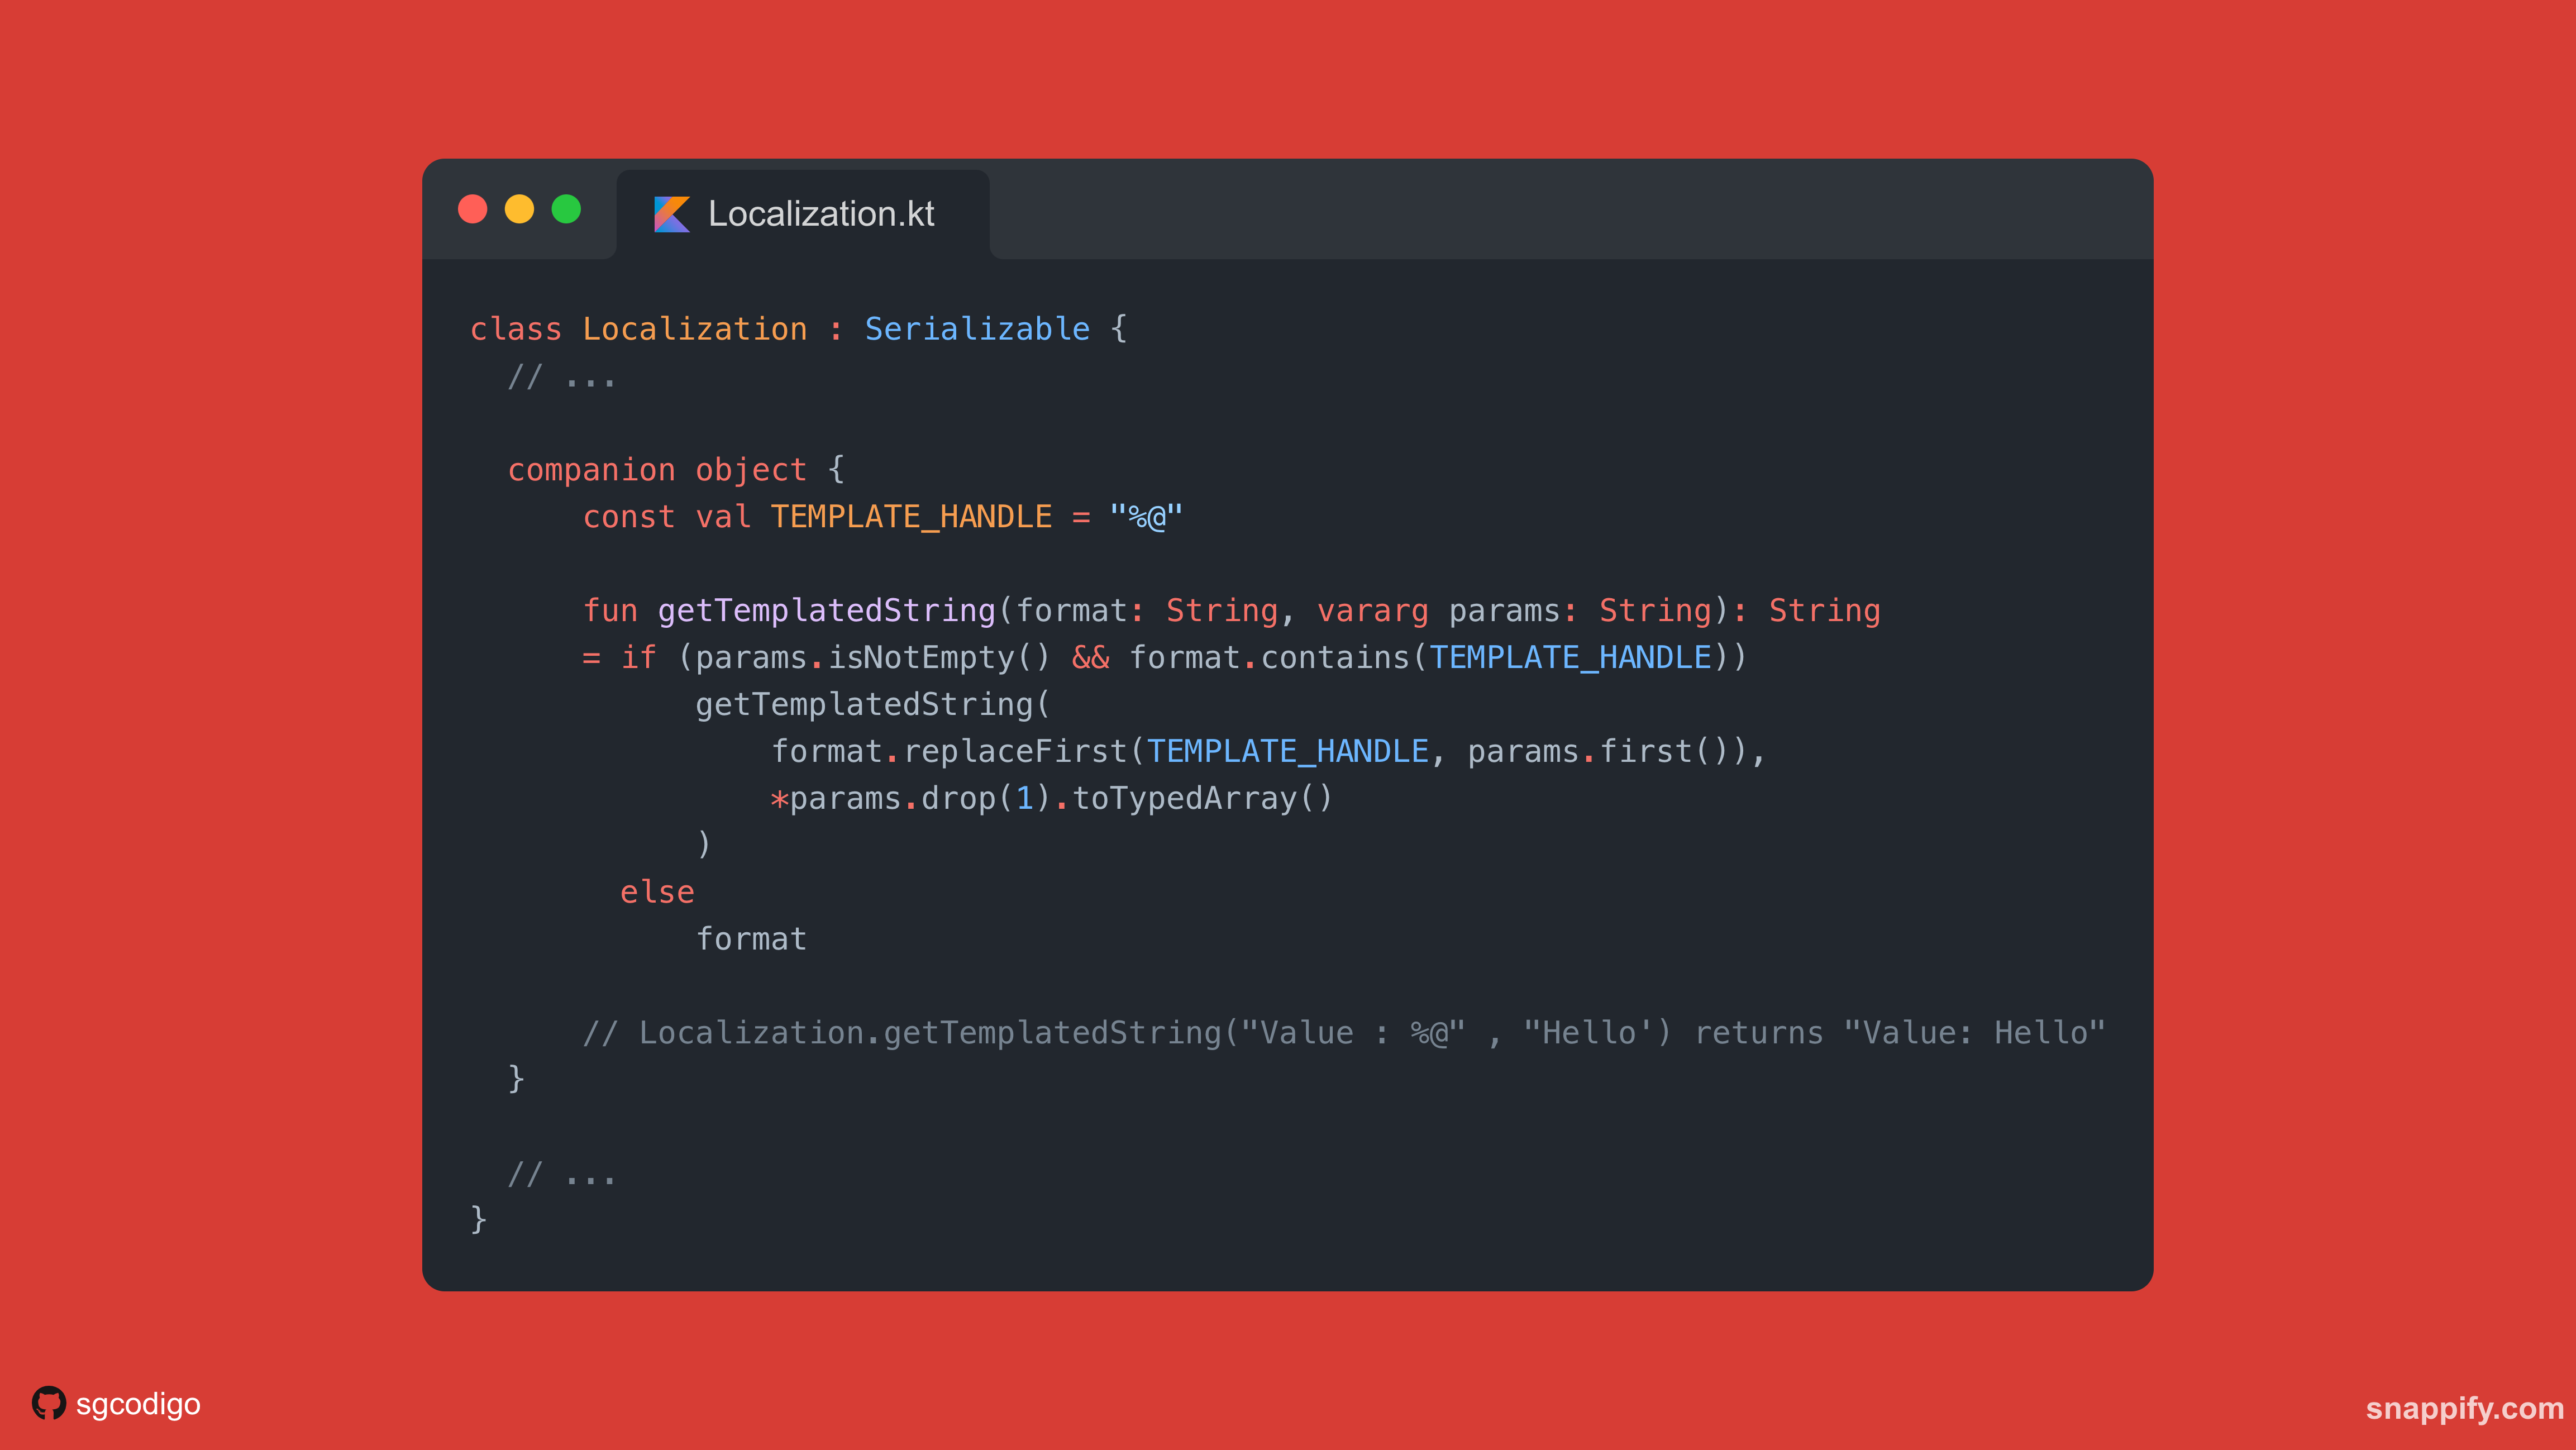
We can extend our implementation further by supporting string templates in our Translations. We can make use of the following method to replace variables in our Translated strings.
In our implementation, we’re using %@ as our template handle. So our function replaces every %@ with passed arguments. We can use any kind of unique character or string for TEMPLATE_HANDLE
That’s it! Cheers!
We’ve successfully implemented the “Dynamic Localization” feature and our UI will reflect the selected language in real time. You can read or try out my full implementation of this demo app in this GitHub repository. You can freely comment on any mistakes or misunderstandings regarding the article, too!
Github - sgcodigo/dynamic-localization-demo